-
Top 12 Most Expensive Drawing Tablets in the world
Freitag, 8. März 2024
In today's world, drawing pen tablets are essential tools for artists, photographers, designers, and digital creators.
It's hard to imagine that it wasn't too long ago that drawing tablets were a luxury. Nowadays, they're so common no one bats an eye when you lug them around.
The world of drawing tablets is a fascinating one, where cutting-edge technology meets sleek design and powerful performance.
But for some, the ordinary just won't do. Enter the realm of the ultra-expensive, the top-of-the-line graphic tablets that push the boundaries of both price and performance.
In this post, some most expensive professional drawing tablets that are available on the market are introduced, including Apple, Wacom, and more. They have wonderful performance and rich features.
Are you looking for a premium tablet? If you have enough budget and want high performance, you can take them into consideration.
Different types of drawing tablets
Drawing tablets can be categorized into three categories namely graphics tablets, pen displays, and Standalone Pen tablets.
Each category accumulate its importance which provides great drawing experience to their users.
1. Graphics Tablets without screen
These tablets come with a stylus and a flat, active surface for drawing or sketching, no display.
You draw on the tablet and view the computer screen separately, so there's a learning curve, takes some time to get used to.
Pen tablets are relatively inexpensive (sometimes < $50), making them a costeffective choice.
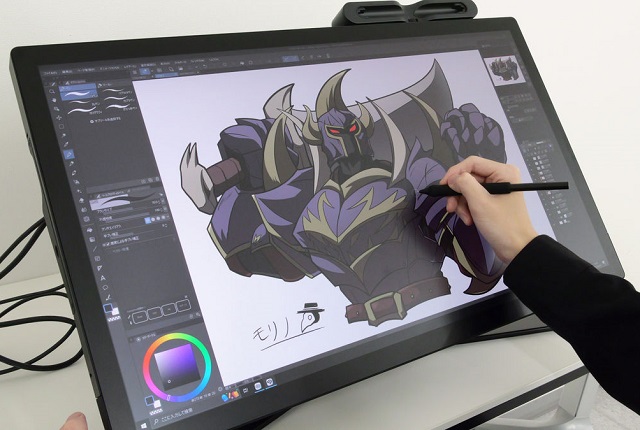
2. Drawing Tablets with screen
Graphic display tablets have a built-in monitor where you can draw directly on with stylus, more Intuitive and natural, but can be expensive.
However, they require a Windows or MacOS computer and power source to work, limiting portability.
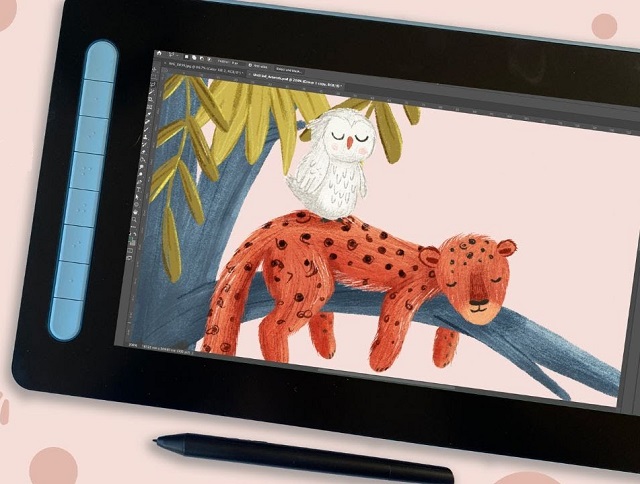
3. Standalone Pen Tablets
Standalone drawing pads are Wireless, works without a computer, lightweight, portable, and allows direct drawing on the screen too.
However, limited access to full-featured desktop software; price are more expensive to most pen displays.
Brands of Drawing Tablets in Brief
There are many tablet brands. And picking the brand of the tablet is one of the most important decisions you will need to make.
Wacom make the highest quality and most reliable tablets. But also they are the most expensive.
Affordable Competitors such as Huion, XP-Pen, Xencelabs are closing the gap with Wacom.
Others - After Wacom, Huion, XP-Pen, there are many other brands that focus on budget or consumer tablets.
If you want a standalone pen tablet, Apple, Samsung, Microsoft are also the big names.
Related Posts: Best Wacom Tablet, Best Huion Tablet , Best XPPen Tablet.
Top 12 Most Expensive Drawing Tablets in the World
These are the machines that push the boundaries of technology and price, catering to the most demanding artists and tech enthusiasts with wallets to match.
Great for people that are looking to set themselves apart from the rest. It's all about prestige and exclusivity!
Without any further ado, let's check out the list.
1. Wacom Intuos Pro
The Wacom Intuos Pro drawing tablet is made for professional creatives, and it feels like pen to paper when you're drawing or sketching on it.
2. XPPen Deco Pro (gen 2)
The XPPen Deco Pro (gen 2) is a fantastic starter tablet or a worthy low-budget upgrade for those who have been making do with older models.
3. Xencelabs Pen Tablet Medium Bundle
The Xencelabs Pen Tablet Medium Bundle tablet is thin and light, but has a quality feel. Open the pen case to choose which of the two supplied styluses you'd like to draw with.
4. Wacom Cintiq Pro 27
The Wacom Cintiq Pro 27 is a best-in-class interactive display for digital artists and editors—the price may be sky-high, but it justifies the spend for pros tied to their pens.
5. XPPen Artist 24 Pro
XPPen Artist 24 Pro is a professional grade pen display that promises a lot to digital artists at a reasonable price.
6. Huion Kamvas Pro 24
The Kamvas Pro 24 is Huion's flagship pen display that can easily go toe to toe with pen displays that are nearly twice as expensive.
7. Xencelabs Pen Display 24
Xencelabs Pen Display 24 is very comfortable and easy to use. For the price, given what comes in the bundle, quality, and its uniqueness we feel it's 100% worth it!
8. iPad Pro
The iPad Pro is light and portable, but can be a fully capable artist's dream drawing tablet - perfect for drawing on the go.
9. Samsung Galaxy Tab S9 Ultra
The Galaxy Tab S9 Ultra is a huge 14.6-inch android tablet that's packed with features, including pro-grade drawing ability - S Pen included, on par with M2 iPad Pro.
10. Surface Pro 9
The Microsoft Surface Pro 9 is a great 2-in-1 that has excellent build quality and sleek design, feels great to draw, write, design and Other productivity work.
11. Wacom MobileStudio Pro 16
The Wacom MobileStudio Pro 16 is a portable-ish drawing tablet with a 4K display and a top-of-the-line pen, perfect for working between 3D and 2D texturing.
12. Huion Kamvas Studio 16
Huion Kamvas Studio 16 is a portable 3-in-1 pen computer which is intended for creators and hybrid work situations.
Conclusion
This article showcases 12 of the most expensive graphics tablets right now while discussing why their exorbitant price tags justified.
While the price tags on these drawing tablets may seem outrageous to the average person, they serve a specific niche market of individuals who demand the best of the best.
Whether you're a serious 3D artist, digital illustrator, graphic designer, or photographer, these tablets provide a level of performance and prestige that can't be matched by any other devices.
However, for most casual hobbyists, a significantly good cheap drawing tablet for beginners with mid-range specs will likely offer more than enough power for your needs.
Ultimately, the choice is yours. Whether these exorbitant price tags are justified depends entirely on your individual needs and budget.
But one thing's for sure: exploring the world of the most expensive drawing tablets is an eye-opening experience, showcasing the incredible advancements in technology and the lengths some artists are willing to go to for the ultimate drawing experience.
Source: https://pctechtest.com/most-expensive-pro-drawing-tablets
-
Best drawing pads for graphic designers
Sonntag, 3. März 2024

In the world of graphic design, having the right tools can make all the difference.
Drawing tablets with pen are most commonly used by graphic designers for digital illustration, photo editing, animation and more.
These tablets are used with a pressure-sensitive stylus that provides a much more natural and intuitive drawing experience compared to a mouse, allowing for higher precision and control in creative tasks.
Graphic tablets also offer useful features like customizable shortcut buttons and multi-touch gestures, making them an indispensable tool for many digital artists and designers.
As a graphic designer, a reliable and efficient graphic tablet is essential to bring your creative visions to life.
However, with so many options available on the market, it can be challenging to determine which tablet is best suited for your design needs.
In this article, pc tech test will explore the 12 best drawing tablets for graphic design today, from all major manufacturers, ensuring you can find the perfect tablet to take your design skills to new heights.
What are the 3 types of drawing tablet for Graphic Design?
There's three types of drawing tables for designers. There's the ones you connect to the computer and it doesn't have a screen , ones you connect to the computer and it does have a screen, and then people will use ipads as drawing tablets.
1. Graphics Tablet without screen
A graphics tablet has a flat plastic surface on which you use the stylus to draw, and the image is displayed on your computer monitor.
While these are the best budget-friendly option, their drawback is the Hand-eye separation between the tablet and the monitor, although many will get used to it very easily.
2. Drawing Tablet with screen
The drawing pen display is a flat-screen monitor that has a pressure-sensitive surface that you can draw on using a stylus.
Unlike graphics tablets, users do not experience Hand-eye separation, but similar to how you would use pen and paper, allowing artists to have a more intuitive and natural drawing experience.
However, There will be more cables between the display and the computer than a graphics tablet, and for some, the pen display will be more expensive.
3. Standalone Drawing Tablet
A Standalone tablet support pen input like the Apple iPad, Microsoft Surface or Samsung Galaxy Tab Android pen tablet does things the other two options do not.
With a Standalone tablet, you do not need to connect to an external monitor or use another computer, giving you more freedom and flexibility as a pen tablet for graphic design.
They are usually the most expensive, but very slim and portable with decent battery life, great for drawing on the go or in different areas of their house without needing to be plugged in.
One disadvantage that a standalone tablet has is that you are more limited on the graphic desig software. Not every desktop program has an iPad OS or Android version, especially the "industry standards".
Top 12 Pen Tablets for Graphic Design in 2024
Although everyone has different needs, these are the best drawing tablet for graphic design in 2024.
We selected these devices for their accurate styluses, excellent displays, and strong performance.
They give artists and designers the tech they need for their creative work.
1. Wacom Intuos
2. XPPen Deco 01 V2
3. Huion HS64
4. XPPen Artist 12 (2nd Gen)
5. Wacom Cintiq 16
6. Huion Kamvas Pro 16
7. XPPen Artist 24 Pro
8. Huion Kamvas Pro 24
9. Wacom Cintiq Pro 24
10. iPad Pro
11. Surface Pro 9
12. Samsung Galaxy Tab S9
What are the best graphic design applications?
Most professional graphic designers use Adobe Photoshop, Illustrator and Indesign.
Others may also use Corel Draw, Affinity Designer, Inkscape, GIMP, Figma, Sketch, etc.
The best graphic design software depends on what you're doing/want to do.
For example, UX Designer/Developer, exclusively use Illustrator CC and Figma in tandem when designing.
Is a drawing tablet mandatory for graphic design?
graphic design is a broad niche with a lot of various fields of study including UI/UX design, App Design, Illustration etc.
Not every designer needs a graphics tablet, which is definitely an option, not a necessity.
You can learn graphic design without a tablet. Many people start their journey using just a computer and mouse.
However, a pen tablet offers much more precision and control than a mouse, ideal for intricate designs. Plus, design tablets are enjoyable to use!
How to choose the best drawing tablet for graphic design?
When selecting the best drawing tablet for graphic design, it's crucial to consider factors such as types, pressure sensitivity, size, resolution, and compatibility with your device and design software.
More pressure levels ensure a more accurate representation of pen strokes, while tablet size can greatly affect the overall drawing experience.
Some prefer a compact tablet for convenience, while others need a larger workspace for intricate projects.
Last but definitely not least, the price or cost of a tablet is the most important factor to consider before you plan on buying a tablet.
Conclusion
Graphic Tablets have revolutionized the design industry by providing a natural and intuitive way for designers to create and refine their work.
Whether it's sketching out initial ideas or putting the finishing touches on a masterpiece, Graphic Tablets is a versatile and powerful tool for design.
In our list you will find something for everyone, whether you're a beginner or a professional graphic designer.
If you want to purchase a workhorse device for your studio, choose the pen display with a larger screen and higher resolution.
Having always been on a business trip, standalone tablet like ipad pro or surface pro is the best travel companion.
If you are inexperienced with digital input devices, grab XPPen Deco 01 V2 or Wacom Intuos to start your inspirational journey!
Embark on your creative journey with confidence, armed with the perfect drawing tablet that suits your artistic needs and preferences.
Source: https://pctechtest.com/best-graphic-design-pen-tablets
-
The best Professional 3D CAD Software
Donnerstag, 29. Februar 2024
If traditional paper and pen drafting methods are not producing the accurate drawings you need, then you need to switch to quick and modern CAD software.
CAD has revolutionized the design process, significantly reducing development time, enhancing collaboration, reducing design cost, improving design quality, and enabling innovative and efficient solutions.
CAD has become an integral factor that moves the world forward. It lets you design everything from tiny pieces of electronic equipment to large airplanes, buildings, and more.
But how do you choose the best 3D CAD software for your needs? There are many options and alternatives available, each with its own features, advantages, and disadvantages.
Different CAD systems are tailored towards certain industries, with crossover and competition between the various CAD software companies.
While it can be worthwhile to invest in a more professional-grade CAD program, you don't always need to dish out tons of cash if you're just starting out.
Here, https://pctechtest.com will go over a brief introduction to top 14 free and paid CAD software in the market to help you find the one that suits your style, budget, and goals.
What is Computer Aided Design (CAD)?
CAD refers to the use of computer software and systems to create, modify, analyze, and optimize designs for a wide range of products, structures, or systems.
CAD technology allows designers, engineers, architects, and other professionals to create precise and detailed 2D or 3D models of their designs, which can be used for visualization, analysis, simulation, and manufacturing purposes.
CAD software provides a digital environment where designers can draft and manipulate geometry, apply various materials and textures, define dimensions and constraints, simulate real-world conditions, and perform complex calculations. These tools offer a more efficient and flexible alternative to traditional manual drafting methods, allowing for faster design iterations, improved accuracy, and the exploration of different design options.
CAD systems are extensively used across various industries, including mechanical engineering, architecture, automotive, aerospace, industrial design, electronics, and many others. They play a crucial role in the product development process, enabling designers to conceptualize ideas, collaborate with team members, test and validate designs, and generate technical documentation necessary for manufacturing or construction.
Some common features and capabilities found in CAD software include:
2D and 3D modeling: Creating detailed representations of objects or structures in two or three dimensions.
Parametric modeling: Defining relationships and constraints between different parts of the design, allowing for easy modification and updating of the model.
Assembly modeling: Building complex assemblies by combining multiple components and defining their relationships and interactions.
Simulation and analysis: Performing virtual testing and analysis of designs to evaluate factors such as structural integrity, motion dynamics, fluid flow, thermal behavior, and more.
Rendering and visualization: Generating realistic images or animations of the design for visual representation and communication purposes.
Drafting and documentation: Generating accurate technical drawings, annotations, and documentation required for manufacturing, construction, or fabrication.
14 Best Professional 3D CAD Software for All Levels
A proper software is a valuable tool to address your pain points during the design process. Here are some of the most popular and highly regarded CAD software options you can use in 2024.
We'll be digging deep into each software to help you decide which one works best for you.
1. Solidworks
SolidWorks is a speciliazed parametric 3D CAD software and is very easy to learn and use.
It enables users to create complex 3D models, assemblies, and simulations, making it popular in the manufacturing and engineering sectors.
2. AutoCAD
AutoCAD is primarily a 2D drafting and documentation software widely used in various industries for creating precise 2D drawings, technical illustrations, and plans.
It is often used in architecture, engineering, and construction (AEC) industries.
3. Fusion 360
Fusion 360 is a web based comprehensive 3D CAD, CAM, and CAE tool offered by Autodesk, with a free version available for hobbyists, students, and startups.
4. CATIA
CATIA is a feature based surface modeling software, and is used to model anything from cars, aeroplanes, reactors etc.
5. Siemens NX
Siemens NX is a powerful and user friendly computer-aided design (CAD), computer-aided engineering (CAE), and computer-aided manufacturing (CAM) software suite.
6. Solid Edge
Solid Edge is a 3D CAD software that used to design and model 2D and 3D mechanical parts, as well as assemblies and their corresponding production drawings.
7. PTC Creo
PTC Creo is a parametric, integrated 3D CAD/CAM/CAE solution for engineering purpose.
8. OnShape
Onshape is professional 3D CAD software that allows you to create complex parts, assemblies, and detailed drawings all within your web browser.
9. Inventor
Autodesk Inventor is a 3D mechanical design software that is used to create and validate product designs.
10. TinkerCad
Tinkercad is a browser-based 3D design and modeling tool, ideal for beginners and hobbyists.
11. Rhino 3D
Rhino 3D is a super versatile and pretty user-friendly 3D CAD program that can produce complex organic manufacturable design.
It's not limited by industry type, so whether you're sculpting a fancy new jewelry piece or drafting up the next skyscraper, Rhino's got your back.
12. FreeCAD
If you are looking for a free and open-source parametric 3D CAD software, I would recommend FreeCAD.
It is a powerful and versatile tool that can be used for a variety of projects.
13. OpenSCAD
OpenSCAD is a text-based CAD software that is used to create 3D models from parametric descriptions.
14. SketchUP
SketchUp is a great 3D sketching tool which is very easy to pick up and get started with.
Is a drawing tablet good for CAD like Fusion360?
3D CAD software is designed around mouse clicks and keyboard shortcuts. No CAD software has optimized user interfaces for pen usage.
But For any digital art painting work, a good pen+tablet is a massive upgrade over a mouse.
Related Posts: XPPen Star G430S vs Huion H420X Comparison, Huion Kamvas 13 vs Wacom One display Comparison, Huion Kamvas Pro 24 vs Wacom Cintiq Pro 24 Comparison.
Conclusion
The best software makes it simple and easy to get your work done with the least fuss. Choosing the right CAD software depends on your specific needs, industry, and level of expertise.
This list of 14 popular CAD systems is by no means exhaustive, however, it gives you a general idea of some of the more commonly used CAD systems.
It's a good idea to try out different programs and see which one works best for you. Furthermore, all the software here is possible to find great tutorials and guidance online.
CAD software can be expensive, but it's a necessity if you work in a field like architecture, design, or engineering.
If money is tight or you are just starting out, the free options mentioned will fulfil your requirements.
A number of these software in this list offer inexpensive student versions, which should come as a boon for learners.
Ultimately, Whether you're an architect, engineer, or designer, discover the best CAD software that aligns with your specific needs and empowers you to bring your creative visions to life efficiently and effectively.
If you think we missed out on any good CAD software, let us know in the comments below.
-
What is the best CAD software for 2D drafting?
Sonntag, 25. Februar 2024
Long gone are the days of sketching, erasing, and tracing designs on large drafting tables under uncomfortable fluorescent lighting.
CAD (Computer-Aided Design) software have transformed the design phase in the engineering, architectural, construction, and manufacturing domains.
The use of CAD softwares for 2D and 3D modelling simplify the old drafting process and also make design process more time efficient.
Depending on your chosen CAD software, you can design and work with anything from architectural drawings to electrical drawings to mechanical schematics.
In general, CAD software can be separated into two categories: 2D CAD software and 3D CAD software. Which type of software you use will come down to the product you're trying to make.
Despite the widespread use of 3D CAD models, the need for 2D drawings is evident for engineering CAD designs. It's still a valuable tool in situations where a full 3D model isn't required.
Looking for the best 2d cad software? Not sure which option is for you? Need some free cad drafting software? Look no further!
pctechtest.com have put together a list of top 7 best free CAD Software for 2D drafting. All of these programs get good marks for how easy they are to use, how well they work, and how happy their customers are with them.
Whether you want a Premium 2D CAD program or just a free one to get started with, one of these 7 options is sure to work for you.
What is the advantage of 2D over 3D CAD drafting?
Drawing the projected views of an object on two planes (x and y-axes) without creating a 3D model is known as two-dimensional computer-aided design, or 2D CAD.
This contrasts with 3D CAD, where the projected views are generated using a 3D model of the object on three planes (x, y, and z-axes).
2D CAD solutions are far more cost-effective than advanced 3D CAD, so it's a very cost-effective alternative to 3D CAD modeling.
3D CAD Programs offer numerous functions for the designer, which many of them are not required. On the other hand, 2D CAD tools contain only the essential functions, which are easy-to-understand, learn and operate.
Formatting is simple, as you are working with. DWG extensions exclusively. Sharing your information and data with others is an absolute breeze, and you don't have to worry about compatibility issues.
2D is often faster than 3D for quick changes and minor projects. If time is of the essence and you will not require elaborate 3D models or renders later, stick to 2D.
7 Best 2d CAD Software Current Now
The best 2D CAD software has tools for annotating, drafting, and drawing, as well as tools for working together to define locations, objects, measurements, and more so that your projects can be finished.
All the 2D CAD tools that we have listed below come with their fair share of pros and cons. Therefore, the best CAD software for you will vary based on your requirement.
1. AutoCAD
AutoCAD is a widely used computer-aided design (CAD) software that allows architects, engineers, and designers to create 2D and 3D models.
2. BricsCAD
BricsCAD is often praised for its affordability and compatibility with AutoCAD, making it a cost-effective choice for those familiar with AutoCAD workflows.
3. Draftsight
DraftSight is a professional-grade 2D solution for creation, editing, and markup for 2D drawings and design.
4. LibreCAD
LibreCAD is a free, open-source, two-dimensional 2D CAD program. It can be used to make 2D drawings that are easy to moderately complex.
5. QCAD
QCAD is an excellent free 2D CAD software that offers a rich set of drawing tools, and even its Professional version is quite affordable with a one-time purchase.
6. NanoCAD
nanoCAD serves as an economical 2D CAD software for DWG editing, providing a cost-effective solution without compromising on quality.
7. TurboCAD
TurboCAD constitutes excellent 2D CAD software that appeals to a wide range of users, from inexperienced beginners to expert users.
Can I use any drawing tablet for CAD ?
A drawing pen tablet for architecture is definitely usable, but the only advantage over a mouse is the lack of wrist strain. on the other hand, The mouse is going to work much better for you.
Typically if you're drawing things up in a CAD software like AutoCAD, you place points to make curves rather than sketch lines free hand so a mouse will allow you to place the points and then move them to adjust your curves more than adequately.
But drawing tablets are better to draw or edit photos, write, 3D sculpt, annotate PDFs, check email, and CA activities on site.
Related Posts: ipad pro vs surface pro, bluetooth graphic tablet, pen display tablet, illustrator drawing tablet .
Conclusion
2D CAD software is a very well-known and heavily used technology nowadays. It has a huge significance in our day-to-day life.
The best 2D CAD softwares are capable tools for laser cutting, CNC machining, floor planning, technical and mechanical drawings in engineering projects, and PCB design where only an overhead is required.
Each of these 7 solutions above is suited for a given function or industry, you can select the best one for your needs and budget.
Once everything is set up and you have got to grips with the program and all the features, It can save you massive amounts of time and cut production costs.
Do share your thoughts with us using the comments section below and don't forget to share this article.
Source: https://pctechtest.com/best-2d-cad-drafting-software
-
Best Free 3D Software for Architecture Design
Samstag, 17. Februar 2024

Technological evolution overthrew the pen and paper method of labor. Architecture software has become an integral part of the design and construction industry.
Architecture software is used for a wide range of purposes, including 2D drafting, 3D modeling, building information modeling (BIM), rendering and visualization, project management, cost estimation, and more.
Architecture software provides architects, engineers, and other professionals with the tools they need to create efficient and effective designs.
It enable users to design buildings and structures as well as their components in 3D, annotate models with 2D drafting elements, and access building data from the database of building models.
It provides a platform for designers to create, share and collaborate on their ideas, as well as to simulate the impact of different design decisions on the building's performance.
Since architectural development is a fairly complicated process that encompasses multiple different stages of modeling, it has a massive number of software solutions available on the market for different purposes and end goals.
As such, choosing the correct one becomes a burden for a lot of people. That's why we've created this comprehensive guide to help you make the right decision when it comes to buying architecture software.
We'll cover the different types of software available, the features to look for, and the price to compare. We'll also provide tips and advice on how to get the most out of your purchase.
Whether you're a professional architect or a student just starting out, this guide will provide you with the information you need to make an informed decision.
What is 3D architecture software?
3D architecture software includes features such as 3D modeling, computer-aided design (CAD) tools, rendering and visualization, so users can design virtual tours and visualize structures.
These tools allow multiple designers and architects to collaborate and co-edit designs via virtual 3D models, improving project management, and reducing errors in construction.
What's the Difference Between CAD and BIM?
Architects and design studios are increasingly turning to two main types of architecture software to design and build projects: BIM and CAD.
CAD (Computer aided design) is the process of using computers to help with the design process of a building, allowing CAD designers to create higher-quality drawings more quickly.
In the AEC (architecture, engineering, and construction) industry, CAD is typically used for two-dimensional designs such as floor plans. It can also be used to create detailed 3D models of buildings and structures.
BIM software contains tools to plan and track various stages in the lifecycle of a building, from concept to construction as well as from maintenance to demolition.
The use of BIM allows architects, contractors and engineers to work together throughout the project using the same database and building model.
Although CAD is a powerful tool, it lacks the data integration and collaborative approach of BIM. BIM can makes the most of the accuracy of CAD and applies it to real-life dimensions and specifications.
Which software or plugin is best for architecture rendering?
Architectural rendering software is a tool used by architects and designers to create images that simulate how a building or structure will look in the real world.
It allows designers to more accurately identify problems in the developmental stages of a design as well as more effectively communicate design ideas with clients.
There is a wide range of software available for architectural modeling and rendering. Some of the best software programs in this field include Enscape, V-Ray, Lumion, and twinmotion.
These programs allow architects to create detailed 3D models of buildings and render them with realistic lighting and effects.
Do you think drawing tablets are useful tools for architects?
Graphic tablets with pen are considered the commonly utilized devices by designers and architects to assist in creating innovative designs.
You can use a digital pen for sketching over quick renderings to explore ideas, sketching new projects from scratch, the process is more enjoyable for architects.
In addition, the architecture design work can be completed with efficiency by utilizing a lesser amount of time. So we recommend you get a drawing tablet for architecture design.
Related Posts: Standalone Pen Tablet, Drawing Tablet with Screen, Wireless Graphics Pad.
10 Best 3D Architecture Software
Below, we'll take a closer look at 10 Best 3D Architecture Design Software in 2024, their features, benefits, pricing, and target audience. you will definitely find something here.
We've tried to showcase many different examples of solutions that could be useful for architects in specific situations and several solutions suitable for pretty much everything.
1. Revit
2. Archicad
3. AutoCAD
4. Sketchup
5. Chief Architect
6. 3DS Max
7. Rhino
8. Vectorworks
9. Civil 3D
10. CATIA
Conclusion
Professional architecture software is an indispensable working tool for architects and designers.
With the right architecture software, you can streamline your workflow, increase productivity, and create stunning designs.
Ultimately, you'll want to select a solution (or solutions) that align with your day-to-day tasks and make your life easier.
Whether you need an architect app that can help you generate more accurate floor plans or sell your ideas to potential clients, the apps outlined above are a great place to start.
The best architecture software will depends on your specific needs, including the type of project, level of expertise, and budget.
Start exploring these architectural design tools and let your architectural visions take shape!
Source: https://pctechtest.com/best-3d-architecture-design-software
-
The Best Free Online Photo Editors
Montag, 5. Februar 2024
If you're looking to quick edit your photos, but you don't want to download software to do so, then an online photo editor that runs directly from your browser might be a good fit.
Luckily, There are plenty of online photo editors available, fast, convenient and many of them are free, perfect to match your skill level and needs.
You'll find that some are great for improving selfies, others are better at adding text, and some have features found in professional software like Photoshop.
Which online photo editor to use? With so many editors available, making a choice can be difficult if you don't know the benefits and features of each app.
Fear not, as we've created a handy guide and a list of the 8 best online photo editors to help you decide which one is right for you.
Why do you need an online photo editor?

The Installed desktop photo editing apps like photoshop may be too much for those who aren't power users or professional photographers.
If you just need to touch up holiday snaps and crop and resize the occasional business asset, the online photo editors will cater to your every need.
Additionally, if you use an OS that doesn't run the app you need, such as ChromeOS and Linux, then an Online Photo Editor will be a boon.
Online photo editors are usually free to use, and provides access to various basic photo editing features.
8 Best Online Photo Editors
Explore the 8 best online photo editors available now, each offering unique features and tools to enhance your images effortlessly.
1. Pixlr
Pixlr stands out with its powerful features and user-friendly interface, making it a top choice among popular photo editing software.
2. Photoshop Express
Adobe Photoshop Express is packed with features that help improve photos significantly.
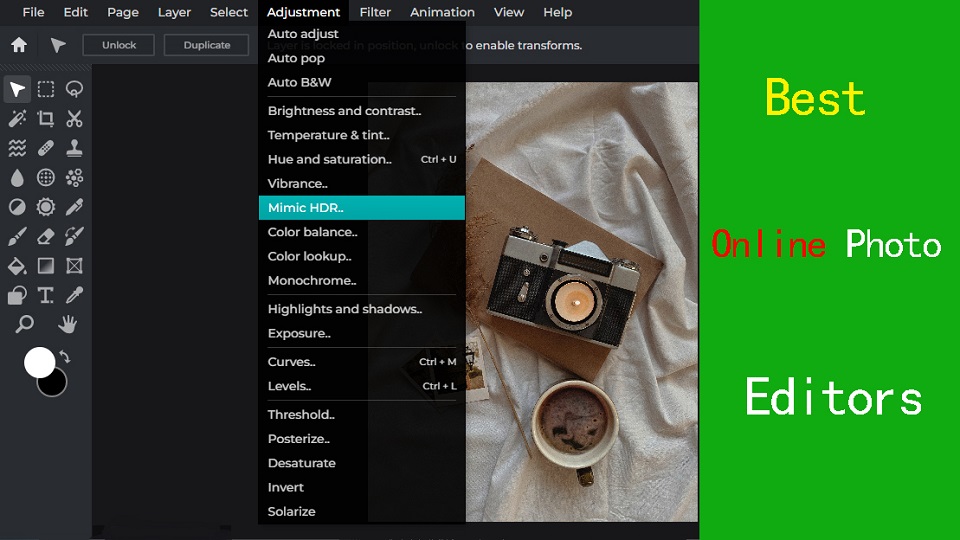
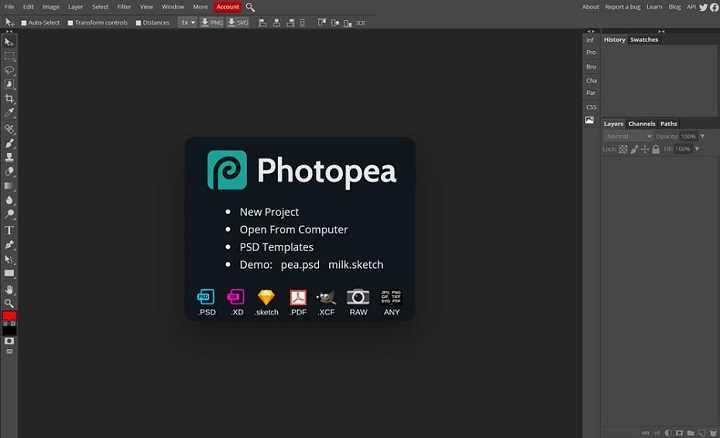
3. Photopea
Photopea is an online image editor that closely resembles Adobe Photoshop in terms of functionality and layout.
It supports PSD files, making it a great choice for users familiar with Photoshop.
4. PicMonkey
PicMonkey is an easy-to-use online photo editor with basic editing features and filters.
5. Canva
Canva offers a variety of design tools including photo editing. It's excellent for creating social media graphics and simple designs.
6. Fotor
Fotor offers a variety of editing tools for photos, collages, and graphic design. It has a user-friendly interface and offers pre-made templates as well.
7. BeFunky
BeFunky offers a fun and easy-to-use interface for editing photos. It also offers tools for creating collages and graphic design projects.
8. PicsArt
Picsart PicsArt is a super powerful online photo editor, which provides us all useful tools to edit photos in very easy steps.
How to Choose the Best Online Photo Editor?
Here are a number of key factors worth to consider before you make your choice
User-Friendly Interface
If you are a beginner, Opt for an editor with a user-friendly design for a smooth and enjoyable editing experience.
Feature Versatility
Look for a balance of powerful features and simplicity that matches your skill level and editing needs.
Some online editors has AI-powered features that simplify complex tasks like background removal and object recognition. One-click presets and automated adjustments also save a lot of time.
Accessibility and Integration
Choose an editor that seamlessly fits into your workflow, allowing you to access and integrate your work across various devices for flexibility and convenience.
Budget and value
It’s clear that all online photo editors have a free version with limited features and can be a great choice depending on your particular needs.
If you have more money to invest or want to access the advanced features, then subscribe to a premium version to unlock other extra advantages may be the best option.
Conclusion
After weighing up the 8 different online photo editors available, It’s clear that all have their own unique advantages and can be a great choice depending on your particular needs.
Whether you need to retouch a portrait, add text to an image, or create a composite image, you can find something fitting for any task.
It is worth noting that if your photo editing needs are more complex than casual use or basic touch-ups, then paying for a subscription of the photoshop or other premium software may be the best option.
So, the next time you need to edit your photos, give one of these online photo editors a try and see the difference they can make!
Related Articles: Best Business Laptops, Inkscape Graphic Tablets.
FAQs
Are there any online RAW photo editors?
Photopea includes a RAW photo editor. However, it has only exposure, temp tint, and contrast.
Most online photo editors doesn't accept raw camera files, so you need to Convert your RAW image file to another format, like JPEG or PNG, to fix the problem.
Desktop RAW Photo Editors like RawTherapee and Darktable can be used to edit and convert RAW files, and you can use them without paying anything.
Online vs Desktop Photo Editor: which one is better?
Online photo editors lack a lot of advanced functionalities that a full version of desktop photo editors like Photoshop, Affinity Photo, or GIMP provides.
For users that are seeking something more advanced for complex projects, you may need a more professional image editing software.
What is the best free online photo editor tool?
There are some great free online photo editors like Photopea, Pixlr, Photoshop Express, PicMonkey, Canva, Fotor, BeFunky, PicsArt, etc.
They generally offer you a free version with limited functionalities, the best one will depends on your favorites and needs.
Do drawing tablet works with Online Photo editor like pixlr?
By using a Pen Tablet for editing photos in an online photo editor like Pixlr, you can create illustrations, montages, manipulate photos and more.
Tablets are really handy if you need to draw a mask on something, or doing other edits that require painting onto the image.
If you just do spot edits and move sliders around for photo editing, it actually seemed to slow down your processing.
-
Best free programs for editing RAW images
Freitag, 2. Februar 2024
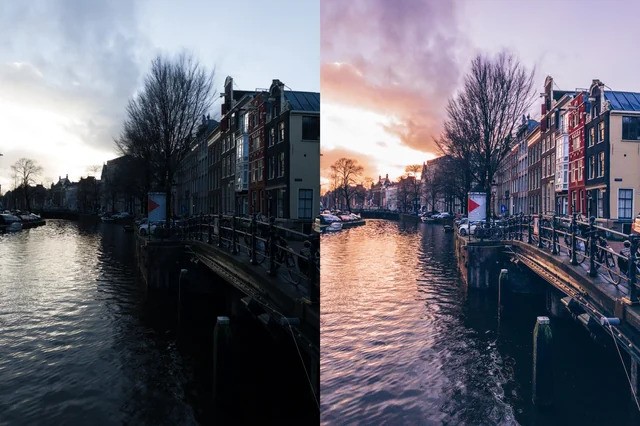
Experienced photographers know Shooting in RAW lets you capture a lot more details of the scene.
But when it comes time to edit these files, you need a RAW photo editor capable of giving you top-quality results.
Every RAW editing software processes images a little differently which can affect sharpness and color, including the Dynamic Range Optimizer (DRO) effect.
From Adobe Lightroom to Darktable, there are a ton of RAW photo editors out there, and finding the right one can be tricky.
Fortunately, We've got lots of experience, and came up with 8 best software for editing RAW photos, from free options to lifetime licenses.
Whether you're a seasoned professional or just starting out, there is an option for you.
What is a raw photo editor, and why should I use one?
A raw photo editor is program designed to process and enhance raw image files captured by digital cameras.
With the power to adjust exposure, shadows, highlights, and more during post-processing, you can breathe new life into lackluster footage or transform good footage into stunning imagery.
8 Best software for editing RAW photos
Here are our top picks for programs for editing RAW files.
We will briefly discuss each below so you can decide which program is best for you.
1. Adobe Lightroom
Adobe Lightroom is the best photography workflow tool for serious enthusiasts who processing raw files and managing a large library of photos.
2. Capture One Pro
Capture One is a professional-grade photo editing software that is known for its advanced color grading and editing tools.
Many people prefer Capture One Pro for its richer rendering of raw images, but requires an effort to master.
3. DxO PhotoLab
DXO Photolab is an amazing RAW photo editing app which allows us to add filters & effects.
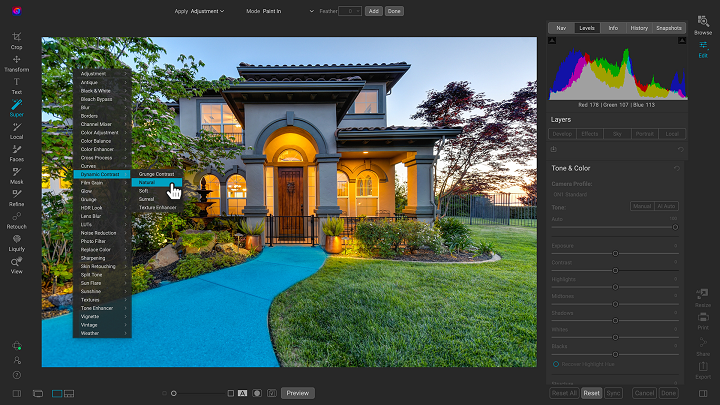
4. On1 Photo Raw
ON1 Photo RAW is the best all round photo editing software.
This tool comes with great features such as an image organizer, Raw processor, layered editor, effects and so many best things.
5. Luminar Neo
Luminar Neo is the most affordable and effective choice in terms of RAW photo editor for you.
The Ai technology allows you to do complicated edits without the need to be a geek, or spend loads and loads of time on the boring bits of post production.
6. ACDSee Ultimate
ACDSee Ultimate offers many powerful photo organizing and editing tools, but its interface can get overwhelming and importing is slow.
7. RawTherapee
RawTherapee is a free, cross-platform raw image processing program.
With its user-friendly interface and numerous features, it is a popular choice among photographers.
8. Darktable
Darktable is a free and cross-platform alternative to Lightroom. I offers non-destructive editing, RAW processing, and a variety of tools for image enhancement.
The interface isn't as intuitive as Lightroom, ant it seems not as fast as Lightroom at editing quickly a bunch of photos .
How to choose the best RAW Photo editor?
Editing RAW images will vary greatly depending on the software you choose to use.
To make sure you choose the right RAW photo editor for your needs, budget, and resources, consider the following features:
Camera compatibility
Make sure you choose software that supports your camera and lenses and provides custom manufacturer profiles.
Camera compatibility is important for achieving accurate colors, maintaining fidelity in the details, and having access to customized tools.
Hardware/OS Compatibility
Before settling on what photo editing software you should use, it's vital to consider its compatibility with your operating system, graphics card, and processor.
RAW Processing performance
All RAW processing editors are NOT the same, so you should pay attention to its RAW processing capabilities, whether the RAW processor is good enough and how well it handles RAW images.
Photography Editing Style
Each photographer has a unique artistic style and needs different editing functionalities.
There are photo editors dedicated to portrait photography, fine art photography, landscape and nature photography, or something else.
Workflow
A good workflow needs an easy-to-use interface and speedy performance.
If you edit images from different places and devices, you might need cloud storage that can keep your pictures synchronized.
Presets and filters
A rich library of presets and filters can save you time and energy. You don't have to recreate the same style over and over again.
Make sure that you choose a photo editor that includes a wide variety of presets and allows you to fine-tune them and save your own for later use.
Digital asset management
Photographers work with large sets of pictures. Besides batch processing, photo editor requires a good image management system, sharing capabilities, and efficient search tools.
If you don't want to use separate software for organizing your images, choose professional photo editing software that provides this functionality. Make sure it allows you to label, rate, sort, share and search images.
Price
Most professional photo editors offer a free trial version.
A perpetual license is a one-time purchase that gives you the right to use a software forever.
With a subscription license, the customer pays monthly or yearly, and the vendor commits to delivering updates over time.
If you're just starting out, a free program may be a much better choice than a more advanced one, even if, technically, it's not as good.
Conclusion
Your RAW editing software should be able to preserve the quality of the photo, have a user-friendly interface, and fast processing speed.
Whether you're a hobbyist or professional, these are 8 of the best photo editing programs out there for handling RAW files.
With Adobe Lightroom being convenient to most photographers, Capture One Pro and Luminar Neo bring in great technology to keep your workflow diverse.
RawTherapee and DarkTable are two of the best free options and are very feature rich.
Find one with the features that are most important to you and have fun!
If one application alone is unlikely to meet your needs, You can use more apps simultaneously.
Related Posts: Drawing Tablets for Photoshop, Best Graphic Design Laptops.
FAQs
What are the differences between JPEG and RAW file formats?
RAW files are lossless and bigger, because they preserves the full data from your camera sensor, providing more flexibility for post-processing.
In comparison, A JPEG image is essentially all that data compressed down into a smaller file size that's easier to share.
What are some unique features in raw photo editors?
Raw editors often offer advanced features like non-destructive editing, which allows you to adjust images without altering the original data.
They also provide precise control over highlights and shadows, exposure, noise reduction, and lens correction.
What are some free Free apps for editing RAW photos?
There are 2 free and open source programs, RawTherapee and DarkTable that benefit photographers interested in investing in learning how to use them.
It's a shame people do not realize how great these programs are but simply see they are free and assume they are not worth anything.
What is the difference between raw editing and regular photo editing software?
Regular photo editing software typically works with compressed image formats like JPEG, PNG, TIFF, etc.
If you need to carry out detailed retouching and repair work, a Regular photo editing software like Photoshop, Affinity Photo, or Gimp is likely to be your first stop.
Raw editors, on the other hand, work with unprocessed data from your camera, offering greater control over exposure, color balance, and detail.
Do I need a pen tablet for RAW photo editing in Lightroom?
There is much more control over the brush as pen tablets are pressure sensitive, so the harder you press the more effect you have.
Pen tablets for editing photos are better if your doing a lot of masking, dodging, burning, touch-up and such in photoshop, and need to trace more complex shapes that are hard to do with a mouse.
As for RAW photo editing in lightroom and alike, The sliders are done better with a mouse, for speed the mouse wheel or manually imputing numbers can be faster.
If you do want to be faster memorising hotkeys & setting custom defaults help as well as a dual display setup.
Additionally, If you have created a graduated filter in Lightroom, but need to erase portions, then the precision of a pen is invaluable.
-
Best free online whiteboards for teaching and collaboration
Mittwoch, 31. Januar 2024
-
The best free video editing apps
Sonntag, 28. Januar 2024
In today's digital age, video content is more popular than ever, It allows you to capture precious moments, create captivating vlogs, produce professional-grade films and more.
The Raw footage looks raw and messy, Videos do not always come out the way we want them, which is why it is so important to have the right video editing software.
From basic transitions to CGI effects, Having the right tools at your disposal can make a world of difference in the quality of your videos.
With so many options available on the market and each one boasting different perks, it can be confusing or difficult to pick the right editing platform.
How in depth does it need to be? Does it include many special effects features? Is it free, cheap or expensive? What platforms do they run on? Fear not!
In this article, we will explore and evaluate 14 of the best video editing software options available on Windows and Mac. We do it in the most straightforward possible language to convey what each delivers and the main differences.
All of these video editors are either entirely free to use or have an excellent free version. And their use ranges from basic to advanced.
Whether you're a professional filmmaker, an aspiring YouTuber and TikToker, or simply someone who enjoys creating videos for personal use, there's a great video editor out there for you.
How to Choose Video Editing Software?
Think about the features that you need for your video editing projects. It helps to make a list of the features you absolutely need, features that would be nice to have, and features you don't really need.
Armed with this information, you will be less tempted to go all-in on that professional video editing software that comes with bells and whistles you'll never use.
If you are looking forward to being a professional video editor we would suggest that you go with the paid software. As they carry some premium features that the free versions do not.
If you're a beginner, it's best to start with free or budget-friendly software and work your way up as you gain more experience.
The choice of the best video editor depends on your specific needs, skill level, and budget.
14 Best Video Editing Software
Whether you want a basic video editor or a tool to create professional-looking videos, this list can give you the best choices.
1. Adobe Premiere Pro
Adobe Premiere Pro is a professional-grade video editing software widely used in the industry. It offers a comprehensive set of tools for video editing, effects, transitions, and audio manipulation. It's suitable for both beginners and advanced users.
2. Final Cut Pro
Final Cut Pro X is a powerful video editing software designed for Apple users. It offers a user-friendly interface and advanced features, making it a favorite among Mac users for marketing video production.
3. DaVinci Resolve
DaVinci Resolve is a feature-rich video editing software known for its color grading capabilities. It's suitable for both editing and color correction, making it an excellent choice for visually impactful marketing videos.
4. Filmora
Filmora is a beginner-friendly video editing software available for both Windows and Mac. It offers an easy-to-use interface with a wide range of effects and templates, making it ideal for quick and straightforward marketing video production.
5. Vegas Pro
Vegas Prooffers a feature-rich environment for video editing, compositing, and audio production. It's been a popular choice for both professionals and hobbyists.
6. Lightworks
Lightworks is a great free video editor with numerous tools to satisfy most casual video editors, although if you want more advanced features, you’ll need to pay for the privilege.
7. HitFilm
HitFilm is a popular video editing software that includes visual effects capabilities. It's a good option for those on a budget who still want access to advanced editing features.
8. PowerDirector
PowerDirector is a relatively easy program to use and will make your video quality look professional.
9. iMovie
iMovie comes pre-installed on Mac computers and is a user-friendly video editing software for beginners. It offers basic editing tools, transitions, and effects, making it a great starting point for simple marketing videos.
10. VSDC
VSDC Video Editor is an amazing software for those who have a limited budget. It is inexpensive and allows users to create high quality content.
11. Shotcut
Shotcut is not a complicated program that supports almost all media file formats. Work with 4K, overlay effects, titles, audio, transitions, effects, and so on.
12. Openshot
Openshot provides high-quality output after editing, making it an excellent and free tool for basic video editing.
13. Corel VideoStudio
Corel VideoStudio has all the characteristics of the other top-of-the-line products on this list, including 360-degree VR and 4k support, but it also has the distinction of being the first piece of consumer video editing software to offer motion tracking.
14. Pinnacle Studio
Pinnacle Studio is an incredible video editor, with many welcome and powerful features and is well-suited for both beginners and intermediate users.
Conclusion
Whether you prioritize advanced features, ease of use, or budget-friendly options, one of these options above will fit your needs.
Take the time to evaluate your requirements, consider your level of expertise, and make an informed decision based on the software's capabilities, pros, cons, system requirements, and cost.
With the right video editing software, you'll be able to bring your creative vision to life and produce stunning videos that captivate your audience.
The key to mastering any video editing software lies in practice and experimentation. So don't be afraid to explore the different features and tools offered by each software.
With dedication and passion, you'll be well on your way to becoming a proficient video editor and achieving your creative aspirations!
Have you found a different free video editor you like? Tell us about it in the comments below.
Related posts: Best Laptops for Music Production, Best Laptops for Graphic Design .
FAQs
How Does Video Editing Software Work?
Also known as a video editor, a video editing program allows you to edit and polish your video post-production with special tools and effects.
It breaks your video down into several clips or segments that you can move and manipulate to fit your needs.
The best video editing software should enable you to swiftly and efficiently edit your material, generate high-quality videos, and enhance your videos with special effects, transitions, and sound.
Who Uses Video Editing Software?
Both amateur and professional filmmakers utilize video editing software, and some television productions use it to create television programs.
You can use video editing software to edit most movie trailers, featurettes, and other things shown on the big screen.
Should I buy a laptop or desktop for video editing?
Desktop is a better option but if you want to edit video on the go, then obviously you need to have a laptop.
What is the best laptop for video editing?
Video editing process demands a lot of processing power, so get a laptop with fast CPU, Discrete Graphics card, ample RAM, and a good quality display.
Some best laptops for video editing include the Apple MacBook Pro, Dell XPS, Razer Blade, Lenovo ThinkPad, Asus Zenbook Pro, etc.
The more powerful the laptop is the better performance it can give in Video editing and rendering.
Is drawing pen tablet good for video editing?
For video editing in premiere pro and alike- a drawing pen tablet probably not much use, unless you are doing frame drawing.
If you've ever experienced carpal tunnel syndrome from using a mouse, you can have a try, The pen is less accurate definitely.
-
The 10 best free software for 3D animation
Mittwoch, 24. Januar 2024

In today's world, 3D animation has become an essential part of the entertainment industry. From movies, television shows to video games, 3D animation is used everywhere to create realistic and engaging visual experiences for the audience.
3D Animation software provides users with a platform to create, design, generate and develop animated 3D graphics, simulations, and drawings. They can help artists and designers to make the most unusual fantasies come to life.
If you're looking to break into 3D animation, choosing your software is the most crucial starting point. A good software can help you save a lot of money, time, and effort.
There are plenty of 3D animation software available on the market, but no one ideal software for everyone. Some of the programs are simple, and a few are complicated. Choosing the best 3D animation programs requires consideration of a wide range of factors.
Fortunately, we have listed the 10 best 3d animation programs here, including both free and paid options, highlighting their pros and cons so you can make an informed choice.
What is 3D animation and its importance?
Unlike traditional 2D animation - 2D Animation software, 3D animation is the process of creating animated images and videos that appear to have three dimensions, using computer software.
The software allows artists to create 3D models of objects, characters, and environments. These 3D models are then rigged, animated, and rendered to create the final product.
3D is very technical and you have lots of other elements to consider outside of just animating: modeling, rigging, lighting, rendering, cameras, etc. And all of these things can break or run into issues…
The importance of 3D animation lies in its ability to create visually stunning and engaging content that can captivate audiences and effectively communicate complex ideas.
It is used extensively in film, television, video games, advertising, and education, among other industries.
How to choose the best 3D Animation Software?
Given that different software has different features, usabilities, and prices, it is imperative that you are aware of the program you acquire.
Some animation software is best suited to building games while others are suited to creating cartoons. So the best choice depends on the type of work you want to create.
Pixar, Rockstar, Epic Games and more all have their own approach to animation. Learn what the pros use, If you want to join these companies.
Of course, the cost is another important factor. Being a beginner you may not want to spend a lot on animation software.
10 Best 3D Animation Software
Are you a professional looking for the best premium 3D animation software, or an amateur seeking the best free option? There will be always suitable software in the list below for your choice.
Please note that the 3D animation software below demands high configuration computers to use, Otherwise you may experience frequent crashes.
1. Autodesk Maya
For making beautiful 3D animations, Autodesk Maya is the movies and visual effects industry standard.
Maya is great in doing character and industrial animation. It's also easily customizable, this means that it can be easily integrated with other third-party software.
2. Autodesk 3DS Max
3DS MAX is a popular and easy to use 3D modeling, animation and rendering software.
It was first used in animation of computer games, and then began to participate in special effects production of film.
3. Cinema 4D
Cinema 4D is pretty easy to pick up, the rigging tools are great fun to work with if you need to do any TD work or just rig your own models for animation.
The animation tools are great to work with too and if that wasn't enough you get the added bonus of the modeling and sculpting features.
4. Houdini
Houdini is mostly used for VFX and simulation, but you can use Animation in Houdini, especially when it comes to hair, body and muscle dynamics.
You could even use it to animate simulations for certain scenes quicker than animating simulations in other 3D software such as Maya or Blender.
5. Modo
Modo is a versatile 3D software program that can be used for a wide range of applications, including 3D modeling, texturing, animation, and rendering.
It has a clean and intuitive interface that is easy to use, making it ideal for beginners and professionals alike.
6. Blender
Blender, a free and open-source piece of software, is extremely well-liked for its adaptability, potent capabilities, and user-friendly design.
Blender provides a full feature set of tools for developing production quality 3D animations.
There are some complexities to Blender but nothing you can't overcome.
7. Daz Studio
Daz Studio is fundamentally intended for 3D person demonstrating, delivering, and movement.
It offers an easy to use interface and many pre-made 3D models and resources.
8. iClone 8
iClone 8 is a popular software for creating real-time 3D animations, particularly for character animation and virtual production.
It offers a range of features such as motion capture integration, character customization, and real-time rendering.
9. Clara.io
Clara.io is an online 3D animation tool which has AI-powered features like automatic camera framing, motion capture for animation, automated lip syncing based on audio, and more.
You can create cartoon characters, rig them for animation, and use the AI tools to speed up the animation process.
10. Cascadeur
Cascadeur is a standalone software for 3D keyframe animation of humanoid or other characters.
Thanks to its AI-assisted tools, you can make key poses really fast, instantly see physical result and adjust secondary motion.
Conclusion
We hope the above list will help you find the perfect tool for your animation needs.
Every software has a few specific functions and gear that every other application can't substitute. What you go with often comes down to budget, operating system and your tech skills.
Think about which features are most important to you and how you're most likely to use animation software. It can be helpful to write a quick list of your top priorities, that way it'll be easier to decide which animation software is best for you.
Many 3D animation software programs offer free trials. We highly recommend you try a few out to get an idea about how it'd look with your workflow.
Have you found the ideal option for your needs? Don't forget to share it with me in the comments section below.
Related Posts: Veikk Drawing Pads , Best Laptops for Gaming, Best Laptops for College Students .
FAQs
What is the best free 3d animation software?
Blender is widely considered to be the best free software for making 3D animations.
It supports entirely 2D and 3D pipelines including modeling, rigging, animation, rendering, compositing, and video editing.
Additionally there are some industry standard tools out there that have free learning editions such as Houdini, Nuke, Clarisse.
Can I do 3D animation without drawing?
While drawing skills can be a valuable asset in the world of 3D animation, they are not a strict requirement.
Many successful 3D animators can still make great animations without knowing how to draw.
Do you need a drawing tablet for 3D animation?
No, Generally you don't need a graphics tablet for 3D animation.
3D animators aren't normally drawing anything, they're adjusting controls created by riggers. And, for the most part, that means there's no big advantage to a drawing tablet.
But graphic tablet is still a must-have for anyone looking to simplify the tedious animation and drawing processes.
-
Best Free PDF Annotators on Windows, Mac, Android, and iPad
Samstag, 20. Januar 2024
PDFs, known for their reliability and universal format, have long been the go-to choice for various documents.
However, the static nature of PDFs often limits the level of interaction one can have with the content.
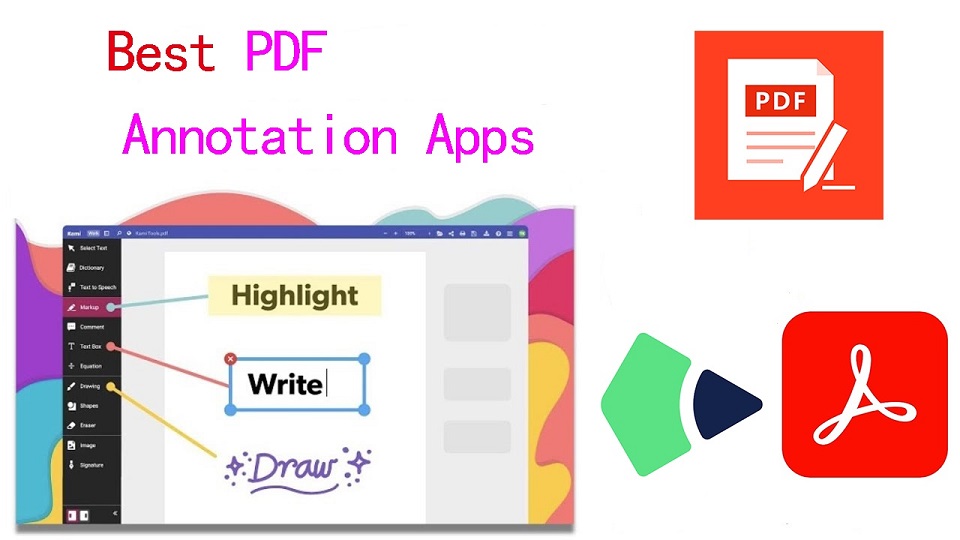
When you want to annotate, highlight, markup and comment on a PDF document, you cann't do so unless you have a PDF annotation app.
PDF annotation apps typically provide a range of features that allow you to draw shapes, highlight text, add notes, and create bookmarks.
They are great for everyone, including students, teachers, business professionals, and anyone working in academia.
There are a ton of PDF annotation tools available today. But which one is the best? Are there any good but also free apps? how many functions does a powerful pdf annotator have?
In this article, we will answer all your questions regarding PDF annotators, and we've also curated a list of the 10 best PDF annotation apps on Windows, Mac, Android, and iPadOS.
What is PDF annotation?
PDF annotation is adding suggestions in the form of comments or digital sticky notes to PDF documents in the proofing stage. Think eBooks, white papers, reports, etc.
What are the benefits of PDF annotation?
Annotating PDF is not only a great way to highlight important sections of your document, but it also allows you to store information and collaborate with others.
Another benefit of using an annotation tool is that it's an efficient means of feedback, which help you remember more and be more productive.
What are the different types of PDF apps?
There are 3 types of PDF apps, including:
1. PDF reader apps help you read PDF files, allowing you to do things like flip through pages, search for phrases, highlight text, and perhaps sign digital forms.
2. PDF annotation apps let you add comments, rearrange pages, add shapes, and insert new text blocks and images.
You can add as much to the document as you want, but you can't change the core, original PDF text.
3. PDF editor apps allow you to change anything in a PDF. You can also create PDFs and forms from scratch in a PDF editor app.
How to choose the best PDF Annotation Software?
The annotations will make sure that your point of view, along with the original content, is visible to whoever has access to your PDF.
When choosing software, these are the things that you need to ensure that your annotation tool has:
A highlight section.
Strikethrough function.
Copy text function.
Ability to add hand drawings and shapes.
While there are some advanced tools out there that will offer you way more than this, these four features are absolute essentials when it comes to annotation software.
If your software has these, rest assured that your annotation experience will be seamless, and you can actually make alterations to your PDF whenever and however you like.
Other Advanced Features include:
Collect signatures: You can send signature requests and let people sign off on documents to mark them for approval.
Add a stamp: You can add a digital stamp to a document, similar to a stamp of approval on physical documents.
Import/export comments: You can import or export comments from one PDF document to another.
Shareable review links: You can create shareable links to your reviews and send them out to anyone to ask them to review a relevant comment in a PDF.
OCR: The OCR features allow you to convert PDF documents into text format.
10 Best PDF Annotation Apps for Windows, Mac, Android & iPad

PDF annotators have made our lives much easier. They not only improve productivity at work but also allow you to collaborate seamlessly with others.
Below are the most popular PDF annotation apps to use, some are free and others are not.
1. Adobe Acrobat
2. Xodo PDF Reader & Editor
3. Foxit PDF Reader
4. Drawboard PDF
5. PDF Expert
6. PDFelement
7. PDF-XChange Editor
8. PDFgear>
9. Xournal ++
10. LiquidText
Conclusion
These 10 best PDF annotation apps can help you annotate your PDFs and do more with them if you need.
It doesn't seem like there's a clear winner. Each app offers a unique set of features and platform compatibility, allowing you to work effortlessly.
Different software being better for different kinds of users. The best one for you will likely come down to price, needs, accessibility, and ease of use.
For example, if you're an Android user and all you need to do is sign the occasional form, Xodo is probably more than enough.
But if you edit eBooks for a living, you may want to invest in a more comprehensive editor like Adobe Acrobat.
Hope this Article helps you a lot.
FAQs
Why is PDF such a popular file format?
PDF file has the perfect balance of file size, portability, editability, compatibility and quality.
The PDF file format is the preferred configuration for documents as it helps them retain their designs appropriately.
Then, it also enables document creators and users to keep their content almost permanently.
It can be viewed, shared, and printed on various operating systems without the need for the original software or fonts used to create the document.
How to annotate in PDF Document?
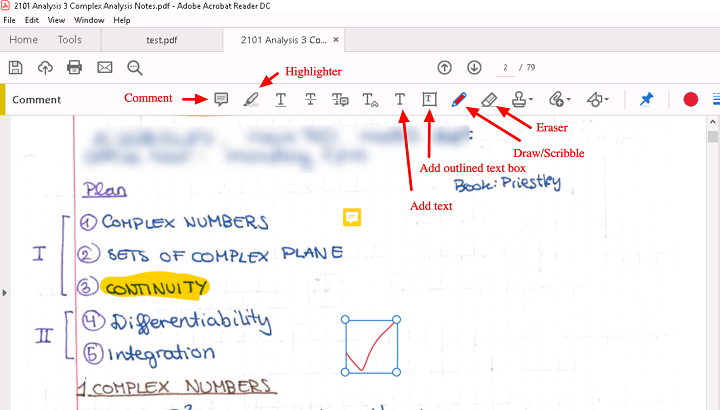
Open a PDF in annotation app like Adobe Acrobat, go to the tool center and select “Comment” .
The comment toolbar will appear above the PDF. Next, you can tap any of them to annotate your PDFs.
You can add text boxes and sticky notes, underline text, strikethrough content, highlight text, and more.
Save your file. You can also use the Share With Others icon to send the file to others for commenting.
Can I annotate a PDF with a graphic tablet or pen?
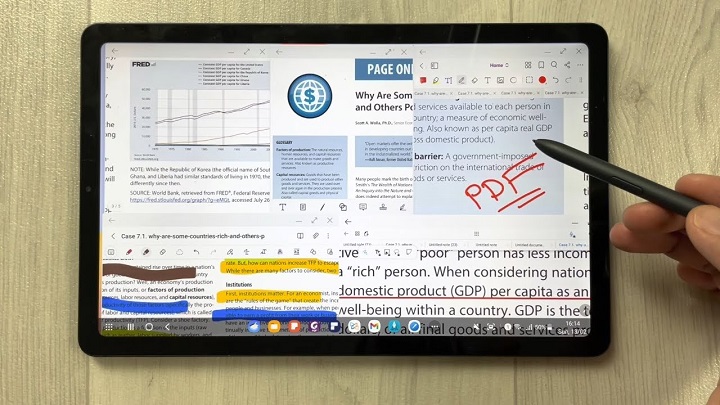
A drawing tablet with pen like Wacom, Android pen tablet, or Apple ipad does have the ability to write in pdf annotation app.
To do this, select the drawing tool in app and you'll be able to write and draw on any pdf.
As you can see, when you have a tablet with stylus, marking up and annotating PDFs is an easy task.
It feels natural like pen and paper, so even signing and filling out forms electronically just feels right.
We highly recommend you get a pen tablet for PDF annotation.
Can I use a note taking app for annotating PDF?
Apps for Taking Notes like OneNote, GoodNotes, Notability, Nebo, Noteshelf, Zoomnotes, Samsung Notes, Squid and more also gives its users the privilege to annotate PDFs on any device of their choice.
How do I annotate a PDF in Chrome?
You can install the Adobe Acrobat extension in your Chrome browser. Then you can easily open PDF file and annotate using the Comment option.
How to annotate a PDF with Microsoft Edge?
Right-click the PDF file you want to edit. Then click Open with > Microsoft Edge.
Your PDF will open in a Microsoft Edge window along with a menu bar of annotation tools: highlight, draw, erase, and add text.
After annotating, save your pdf file through save as option, and the new saved file will work fine. All annotation and editing options will work on it.
-
Best Free Painting Apps on Android and iPad
Donnerstag, 18. Januar 2024
Drawing is one of the most common and fun things. But gone are the days when you needed a pencil and paper to draw something.
Digital Art allows you to create any form of illustration whether portrait, logo, cartoon, or animation.
With Android drawing pads and Apple iPads that supports the pen input, you can create digital art no matter where or when you are.
When you have a mobile pen tablet, one of the many things you can do is get creative with the best drawing apps.
There are lots of great drawing apps available on the market. The only problem is, which one to pick?
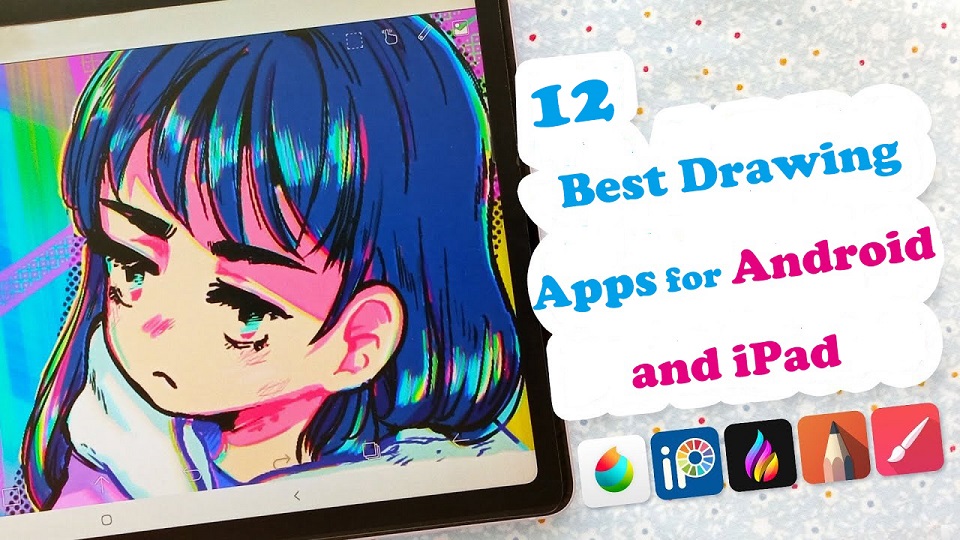
To help you answer that question, we've rounded up the 12 best drawing apps for iPad & Android.
Whether you're an experienced artist or a total novice, looking for a versatility, or a simple one, there is an option for you.
What does a drawing app do?
The drawing app come with a wide range of features, from basic sketching tools to more advanced ones with layers of filters.
It can help you to express yourself effectively and take your drawing skill to the next level.
12 Best Drawing Apps for iPad and Android
This list includes both free and paid apps, each one offers its own unique features and capabilities — whether that be precise vector art, bold line work, or digital painting.
1. Procreate
Procreate is a professional digital painting app for iPad with customizable brushes, layer options, and over 200 tools for sketching, drawing, and painting. It's intuitive and versatile, making it a favorite among digital artists.
2. Adobe Fresco
Adobe Fresco is a digital drawing and painting app designed for artists and designers on windows and iPad.
It offers a variety of brushes and painting tools, including live brushes that simulate real media.
Additionally, it allows users to import and export their work across Adobe Creative Cloud apps
3. Infinite Painter
Infinite Painter is a versatile painting and drawing app with a wide range of brushes, tools, and features.
4. Ibis Paint X
Ibis Paint is a great all-around drawing tool that also includes a coloring feature. It offers a wide variety of brushes and tools, as well as the ability to import your own drawings.
5. Clip Studio Paint
Clip Studio Paint is a powerful app for comic and manga creation that also includes a wide range of painting tools.
6. Sketchbook
Sketchbook is a professional-grade digital art app for iPad and android with over 140 customizable brushes, layer options, symmetry tools, and other features for precision drawing and designing.
It's suitable for artists, designers, and illustrators of all levels.
7. Artflow
ArtFlow is a great option for drawing and coloring on Android. It offers a wide variety of brushes and tools, as well as the ability to create layers.
8. Krita
Krita is a free and open-source digital painting and drawing software that is popular among artists, illustrators, and designers.
9. Medibang Paint
MediBang Paint is a free and lightweight app with a wide range of brushes and tools, as well as cloud storage for your artwork.
10. PaperColor
PaperColor is a great option for creating realistic drawings on Android phones and tablets. It offers a variety of brushes and tools, as well as the ability to import images.
11. Affinity Designer
Affinity Designer is a vector-based drawing and design app that allows users to create and edit complex illustrations and designs.
12. Dotpict
Dotpict is a mobile app available for iPadOS and Android devices that allows you to create pixel art with a simple and intuitive interface.
It provides a grid-based canvas and a variety of drawing tools, including zooming and color picker features.
Conclusion
If you want to paint digitally and hone your artistic skills on iPads or Android tablets, these drawing apps are a great start to do so!
Each jam-packed with tools and features to help you get creative.
You can use them to creat beautiful artworks, or just for relaxing and passing the time by doodling whatever comes to your mind.
The best one for you will depend on your specific needs, preferences and budget.
It's recommended to try few of these apps and find the one that suits you the best.
Hopefully you've found this article helpful in narrowing down your choices.
Happy drawing!
Similar Posts: Apps for Graphic Design, Drawing Software for PC & Mac , Programs for Photo Retouching & Editing .
FAQs
What is the best drawing app for iPad?
Procreate is the favorite but Adobe Fresco and Clip Studio Paint have got a lot going for them.
Adobe Fresco uses Adobe brushes and Adobe fonts and can do some vector, Clip Studio has an amazing vector erase brush engine and you can do larger files than Procreate can.
Ibis Paint, Medibang Paint, and Sketchbook are free.
Are there any good drawing Apps on Android?
Clip Studio Paint, Ibis Paint X, Sketchbook, Infinite Painter — these are the ones that we know are very popular and commonly used for Android artists.
Is Apple Pencil or Samsung S Pen worth it for drawing?
The Apple Pencil or S Pen is definitely important as a finger and finger like stylus do not have pressure sensitivity.
With an ideal accessory like the Apple Pencil or S Pen, Which has palm rejection, pressure sensitivity and tilt recognition, you can get the most out of the drawing app and tablet.
Source: https://pctechtest.com/best-art-drawing-apps-for-android-and-ipad
-
12 best Software for 3D Modeling
Dienstag, 16. Januar 2024

Digital Art has been continuously developing, and thanks to technology, it gets even better and easier.
3D modeling is a technique employed in computer graphics for creating a three-dimensional digital representation of any object or surface.
3D modeling is used for a wide range of purposes, including the design and manufacture of objects, architecture and engineering, education and scientific research, video games, and film and television.
3D modeling software adds value and eases the 3D modeling creation task. As technology advances, they has become an essential tool for various industries and personal projects.
They help to bring design concepts to life and allow for realistic visualization of products, buildings, and even characters for movies and video games.
There are many options available when it comes to 3D modeling software, ranging from free and open-source software to expensive professional software used in the entertainment and architecture industries.
Additionally, All 3D modeling software has its own set of unique features and toolkits, so mastering two or more might be challenging. It takes time to learn the skill and get familiarized with different tools.
Spending a lot of money on the wrong software is a good way to sabotage yourself in the long run. So you need to choose carefully to make sure you find the best 3D modeling software for you.
When choosing a software, it’s important to consider what you want to achieve with your modeling, as well as your skill level and budget.
In this guide, we review the 12 best 3D modeling software. We’ll cover all the important aspects you need to know, from price and usability to what person each program is best suited for.
CAD vs 3D modeling software: which one to choose?
3D Design software divides into two categories: CAD and 3D modeling.
CAD (Computer-Aided Design) and 3D modeling software are similar in that they both allow you to create 3D digital models. However, they differ in the way they are used and the types of models they are designed to create.
3D CAD software is primarily used for technical design, 3D printing and engineering purposes, and focuses on precision and functionality. It’s often used to create detailed technical drawings, schematics, and manufacturing plans for products.
Examples of CAD software include AutoCAD, SolidWorks, Fusion 360, Sketchup, Rhinoceros, Inventor, FreeCAD, OnShape, OpenSCAD, and TinkerCAD.
3D modeling software, on the other hand, is used for a wider range of applications, including animation, film and game design, architecture, and product visualization. It’s more focused on creating realistic and aesthetically pleasing models, and often has a greater range of creative tools and features.
Examples of 3D modeling software include Zbrush, Blender, 3ds Max, Maya, Cinema 4D, Houdini, Modo, Mudbox, and Sculptris.
In summary, CAD software is used for technical design and engineering purposes, while 3D modeling software is used for a wider range of creative applications.
What are the three major types of 3D modeling?
Polygonal modeling, curve modeling, digital sculpting, Parametric modeling, Box modeling, Boolean modeling, procedural modeling and 3D scanning are all methods available to users of 3D modeling software.
However, the most popular three principal methodologies are Polygonal modeling, Spline/curve modeling, and digital sculpting. Each of these techniques offers a unique approach to 3D design, thus catering to different requirements and skill levels.
Polygonal modeling is arguably the most common method used today among the 3D modeling software options. It forms the cornerstone of much of the 3D modeling work carried out.
This technique involves creating objects and characters from an interconnected mesh of tiny geometric shapes known as polygons. The level of detail achievable in the final product is directly proportional to the number of polygons used.
This polygon-modelled object that we produced may be considered a hard surface, which is good for modeling things like buildings and cars.
Digital Sculpting begins with a flat digital shape, which is then manipulated — similar to how an artist might mold clay — to create a new object or design.
Digital Sculpting is typically employed for creating characters, animals, or other living things. This technique often finds preference among artists for its intuitive, hands-on approach to 3D modeling.
NURBS stands for non-uniform rational b-spline. Using control points, we generate incredibly smooth curved surfaces that can be manipulated.
This method is particularly useful when precision is paramount, as it allows for exact representations of complex geometric forms. Although it might present a steeper learning curve compared to polygonal modeling or digital sculpting.
What is 3D mesh?
Meshes are one of the most essential components in 3D modeling.
3D meshes use reference points in X, Y and Z axes to define shapes with height, width and depth.
A 3D mesh is the structural build of a 3D model consisting of polygons. The polygons used are typically quadrangles or triangles.
Usually it can take large numbers of polygons to make a 3D mesh approach photorealism.
12 Best 3D Modeling software
Regardless if you’re a complete beginner or an experienced 3D modeler, you’ll find a suitable option below.
Although, to make our list precise and straight-to-the-point, some programs have been excluded, therefore there shouldn’t be a cause for alarm if several premium ones are not listed here.
1. Zbrush
2. Blender
3. 3Ds Max
4. Maya
5. Cinema 4D
6. Rhino 3D
7. Sketchup
8. Houdini
9. Modo
10. Sculptris
11. Mudbox
12. Fusion 360
Conclusion
3D modeling is a fascinating and rewarding skill that offers endless possibilities for creation and design.
Whether you are interested in creating 3D miniatures or pursuing a career in 3D modeling, mastering the basics of 3D modeling software and techniques is the key to unlocking your full potential.
Choosing the right 3D modeling software is a tough decision, especially when all of them have mostly similar basic features.
With the help of this guide, you’ll be able to choose the right software and start your journey towards becoming a skilled 3D modeler.
If you’re still unsure which one to choose, We do recommend watching some videos on each program before you commit to see it is for you. You may even test two or three applications to determine which one works best for you.
Talk to us if you have questions or concerns with these tools. We will be more than willing to help!
FAQs
What is the best free 3D modeling software for newbies?
If you’re looking for free 3D modeling software, it doesn’t get any better than Blender. It is free but powerful for 3d modeling, texturing, animation and rendering.
Should I learn Blender or Maya first?
It simply depends what your needs are.
Considering the price and the support of the community, Maya is advised for big companies and studios. They can not only afford the 3D software but also need really advanced tools.
Being free makes Blender a great starting point for beginners, and its rich tools allow you to achieve the quality of modeling and sculpting that is not worse than in Maya.
Blender is a great solution for small-scale use in studios, for freelancers, and for hobbyists.
Do I need a graphics tablet for 3D modeling and Sculpting?
You don’t necessarily need a graphics tablet for 3D modeling & Sculpting, but it can certainly be helpful. It depends on your personal preference and workflow.
Many 3D artists use a combination of a mouse and keyboard to create their models. However, a graphics tablet can provide more precision and control, especially when it comes to digital sculpting and painting textures.
One of the main reasons that drawing tablets are so useful for 3D Modeling, Sculpting and painting is the incredible level of pen pressure sensitivity they’re capable of.
With pen sensitivities routinely going as high as being able to recognise as much as 8,192 levels of pressure, you can get truly granular with line thickness and shape.
Related Posts: Best Drawing tablets for ZBrush & Blender
What is the best software for 3D rendering?
There are a lot of software that is used for rendering 3D scenes. But it depends on the type of project that you are working and how you want to render your scene.
For example, if you were to render an animation for film, you would often use path-tracing renderers that render scene.
A few popular options are Arnold Renderer, Maya’s third party rendering software, or Blender’s cycles. All are great for 3D environment render and both are shipped with the 3D software itself.
You could also try a few outside rendering software such as RedShift or VRay as both are strong renderers for realistic rendering.
Another example, if you want to render 3D games with very high quality, then ray-tracing engines from game engines, like UE or Unity for example, are great options.
-
Best free and paid software for 2D animation
Donnerstag, 11. Januar 2024

In today's world, animation is extremely popular. It is a form of art that has captured the imagination of humans for quite a long time.
2D animation is the most understood, traditional, and popular form of animation that creates motion in images in a two-dimensional space.
2D animation software is often required for the creation of complex animations and is used by professionals like game developers, cartoonists, architects, and artists.
Thankfully, Whether you're a beginner or a professional, a Windows user or a Mac user, there are plenty of different animation software to choose from.
However, the selection process can be tricky due to the multitude of options available.
Are you familiar with animation software? Looking for an animation software app but are not sure whether it will help you achieve your goals and fit right into your lifestyle?
In this article, we will take a look at the top 12 best 2D animation software in 2024, based on their features, tools and prices.
We will also discuss the advantages and disadvantages of each software so that you can make an informed decision when choosing the right animation software for your needs.
What is 2D Animation?
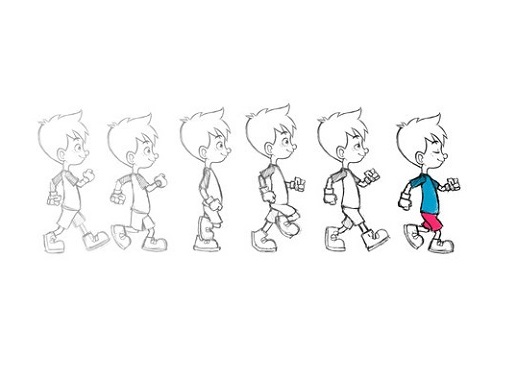
2D animation is the art of creating movement in a two-dimensional space. This includes characters, creatures, FX, and backgrounds. The illusion of movement is created when individual drawings are sequenced together over time.
While this process is sometimes referred to as traditional animation, mainstream 2D production has evolved from hand drawn processes using pencil and paper to the implementation of digital techniques using computer software like Toon Boom Harmony or Adobe Animate CC.
Despite the advances in technology, the core principles of 2D animation remain the same. Each frame is carefully crafted to create movement, and the frames are played back at a speed of 24 frames per second (24fps) to create the illusion of motion.
This illusion of movement has grown to become a top art form that is not only used in the entertainment industry. Various other industries, such as Advertisement, Marketing, Gaming, Retail, Architecture, and Engineering, use 2D animation in multiple ways.
What is 2D Animation software?
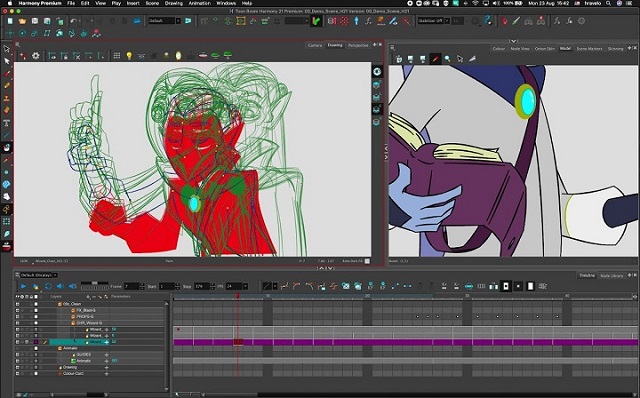
2D Animation software is an important tool used by modern animators to create stunning visuals and effects. It brings in life to the graphics creating an illusion of movement by arranging the graphics in a sequence.
Using 2D animation software, even an amateur artist will be able to create interesting animations, stop-motion, motion graphics, etc.
What is the difference between 2D and 3D animation?
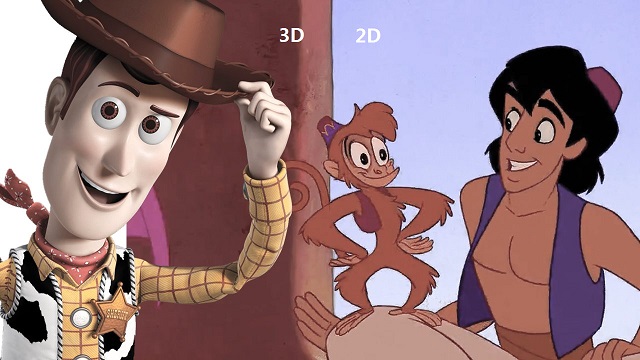
2D animation involves creating objects in a two-dimensional space, showing width and height. As an example, classic Disney movies are in 2D.
3D animation involves a two-dimensional object depicted in three dimensions. 3D objects can be rotated, flipped, and moved like real objects.
For animators, is that 2D animation is more artistic and 3D is more mechanical/technical.
2D requires a large amount of illustration, as every frame needs to be drawn, either on a graphic tablet or hand drawn on paper.
For 3D animations, all frames must be rendered after modeling is complete. It is tasked with creating movement via ‘rigs', where a 3D model is essentially given a skeleton that can be manipulated in a virtual 3D space. you also need a 3D animation software.
The type of animation you pursue will mostly come down to your artistic preference and budget (2D animation is more cheaper).
12 Best 2D Animation Software in 2024

With the right software, it is fun creating 2D animation. You only have to get your script and storyboard ready.
Here's our compiled a list of the best paid and free 2D animation software out there to help you make the right decision for your animation needs!
1. Toon Boom Harmony
2. Adobe Animate
3. Moho Pro
4. Synfig Studio
5. Opentoonz
6. Pencil2D
7. Cartoon Animator 5
8. TVPaint Animation
9. DigiCel Flipbook
10. Blender
11. Krita
12. After Effects
Conclusion
As you can see, there are many animation software on the market today, each with its own unique set of features and pricing structure.
Whether you're looking to create 2D gaming environments, social media graphics, or cartoons, there's a top-quality animation software option on this list for you.
While some of these may be suited for professionals, most are generally user friendly to beginners as well.
Think about which features are most important to you, your budget, and how you're most likely to use animation software. Then select the one that best suits your requirement.
We hope it will help you hone your foundation skills, practice animation styles, and help you get professional results.
Have you used any of the software mentioned above before? Which one works for you and do you have any other recommendation? Share with us.
FAQs
Do people still use 2D animation?
While 3D animation is the most prominent type of animation in modern cinema, 2D animation remains a popular and essential medium for creating engaging and compelling content.
2D animation is often used in television shows, movies, commercials, and other forms of visual media.
It has a long history and is still a popular and widely used technique today, often praised for its ability to convey emotion and character in a simple, stylized way.
Do I need a graphics tablet for 2D animation?
A drawing tablet for animation is more or less essential for 2D animators, digital sculptors, story board artists, and concept artists. It works well with the drawing, sketching and animation software.
Compared to a mouse, A graphics tablet with pen allows for more precise and natural drawing, which can lead to smoother and more detailed animations.
All the pen tablets have great pressure sensitivity, which allows you to vary the line thickness and opacity by adjusting the pressure applied.
Graphics tablets with display are even more convenient as you draw on the screen directly. This creates a more natural and intuitive drawing experience.
Can I creat 2D animation if I can't draw?
There are actually several options for creating 2D animations without having to draw everything by hand.
One option is to use software that allows you to manipulate pre-made assets, such as characters, backgrounds, and props.
Another option is to use motion graphics software that allows you to animate text and shapes.
-
Best apps for Taking Notes on iPad, Android, PC and Mac
Montag, 8. Januar 2024

Note-taking is one of the best habits anyone can instill. The mere act of writing whatever you learn in lectures, seminars, and even life in general, can have a profound impact on your life.
A note-taking app is a lightweight tool that allows you to digitally record information on your device instead of writing it on paper.
You can type, draw, add images, checklists and even attach files to your notes. There are lots of modern abilities which you can check out and you will like it.
The best note taking apps make it simple and easy to organize essential information and store it for quick access.
What's more, some note taking apps is cross-platform and works on Mac, Windows, Chrome OS, iPadOS and Android – a huge advantage since people normally use all kinds of devices. Everything is also synced across the devices.
Note-taking apps have all but taken the place of paper notes, and, with all of their extensive functions, can help you build an easily-accessible second brain.
There are now hundreds of note-taking tools available to users, But which one is the best for you? Sometimes too many options can be overwhelming.
Choosing the right note-taking app can be a daunting task, but don't worry – We have narrowed down the top 20 picks for note-taking apps to help you.
The 20 Best Note-Taking Apps in 2024
Here are 20 popular note taking apps that are widely used right now. Some are all-around great choices for every note-taking task, while others are more suited to individual or collaborative use.
1. OneNote
OneNote is a comprehensive note-taking app developed by Microsoft. It allows users to create notes in various formats, including text, images, and audio, and organize them in notebooks and sections.
2. Notion
Notion is a versatile productivity app that combines note-taking, project management, and database functionalities. It allows users to create notes and organize them in a hierarchical structure, as well as collaborate with others and track tasks.
3. Evernote
Evernote has been a popular choice for note-taking for many years. It has a wide range of features, including the ability to create notebooks, organize notes with tags, and sync across devices.
4. Obsidian
Obsidian is a great app for taking notes and organizing your thoughts. It's simple to use and has a lot of features that other note-taking apps don't have. The only downside to Obsidian is that it's not free, but it's worth the price.
5. Joplin
Joplin is an open-source note-taking and to-do app that allows for the creation of plain-text notes and supports synchronization with various cloud services. It runs on iOS, macOS, Android, Windows, and Linux.
6. Google Keep
Google Keep is a simple and easy-to-use note-taking app that integrates with other Google services, such as Google Docs and Google Drive. It allows users to create notes, lists, and reminders.
7. SimpleNote
Simplenote is a minimalistic note-taking app that allows users to create, edit, and sync notes across devices. It also supports tagging and search functionalities.
8. Standard Notes
Standard Notes is a secure and private note-taking app that offers plain-text editing, encryption, and cross-platform synchronization.
9. Zoho Notebook
Zoho Notebook is a beautiful and intuitive app that lets you create notes, lists, sketches, audio recordings and web clippings.
10. Bear
Bear is a stylish and intuitive note-taking app known for its markdown support, making it ideal for students who need to format their notes efficiently.
11. Notability
Notability is a powerful and versatile note-taking app that allows students to take handwritten notes, annotate PDFs, record lectures, and organize their notes effectively. It also supports syncing with cloud storage services like Google Drive and Dropbox.
12. GoodNotes
GoodNotes is another popular app for handwritten note-taking. It offers a wide range of pen and highlighter options, shape recognition, and advanced search capabilities to find notes quickly.
13. Roam Research
Roam Research is a powerful PKM tool designed for pro note-takers to make notes, capture ideas and most importantly connect them up using backlinks & a graph.
14. Squid
Squid is a powerful, intuitive, and delightful Android note-taking app. You can take handwritten notes just like you would on paper, but with many advantages of digital vector ink! Easily markup PDFs to fill out forms, edit/grade papers, take lecture notes, or sign documents.
15. Logseq
Logseq is a personal knowledge management tool that is not well-known, but it's one of the best note-taking apps out there.
Logseq's "interstitial journaling" approach allows for seamless integration of daily tasks and thoughts, making it a useful tool for productivity and organization.
16. Workflowy
Workflowy is a clean and distraction-free app that helps you quickly capture notes, plan your to-do's, and get organized. Simple to use, but incredibly powerful, Workflowy can help you manage all the information in your life.
17. Dynalist
Being an outliner software, Dynalist is a collaborative note-taking tool that can also help you take notes hierarchically. The software organizes information in a way that helps you with recall, much like a second brain.
18. Ulysses
Ulysses is a powerful tool perfect for Mac users who want to take their note-taking to the next level. It is a feature-rich app with a clean and simple interface, making it easy to use.
However, this tool is not freely available, hindering some people from being able to utilize it.
19. Apple Notes
The pre-installed Apple Notes app is a simple and user-friendly option for basic note-taking. It supports text, handwriting, images, and checklists and syncs across all Apple devices.
20. Dropbox Paper
Dropbox Paper is a document editor and note taking app that can be greatly beneficial in a wide range of scenarios.
Users will find Dropbox Paper's simple and distraction-free layout makes it perfect for everyday writing.
How to choose the best note taking apps?
The app you use for note-taking can have a huge impact on the quality of your notes. You need to consider some important factors before choosing.
We have assessed note taking apps for ease of use, features, organization tools, team collaboration, cloud storage, cross-platform compatibility, handwriting support, and a number of other factors.
Add all types of content
Most note taking apps allow you to add a wide variety of content to your notes. for example, with Audio recording function support, you can record sound bites from your lectures, or even an entire lecture, as a backup to your note-taking.
Using apps like OneNote you can record audio or video into a page, embed online videos and other content, clip from your screen or the web, print documents directly into your notebook and add photographs or scan documents using your devices camera and Microsoft Lens.
Organization Tools
One of the main aspects of note-taking apps is how they organize your notes. There are broadly two organizational systems that note-taking apps use: folders and tags.
Folders are what you'll likely be familiar with from Windows' File Explorer or Finder on Mac.
Tags use a different approach. You first give each note page a unique label (or tag). Then, you can find notes under a specific tag by selecting the tag name in your workspace.
Evernote utilizes a good tagging system. However, it's not the best choice for using folders, as it only offers two layers of depth: Notebooks and Notebook Stacks.
If you want a deeper hierarchy, Notion is a top choice that uses infinitely-nested folders, so you can create a fully fleshed-out structure for your notes.
Team Collaboration
If you're working with a group of colleagues, consider creating a shared online notebook so you can collectively collate notes and resources and add comments without having to physically meet up.
This means you can't lose shared material. Notes can be shared with the click of a button, and as long as they are saved or backed up it's pretty difficult to lose them.
Search Functionality
An obvious reason for you to take notes is so that you can go back and review them later. But sometimes flipping through pages of notes to find one piece of information can be frustrating.
Many note-taking apps offer search functionality where you can search for keywords and phrases to quickly find information. Some note-taking apps even allow you to search your handwriting.
Cloud Storage
If you use OneNote, your notes will be stored in your Office 365 account by default. This will make them available on any device as long as you log into the apps using your University account details.
Most other note taking apps include cloud storage too. Keeping your notes in the cloud means they're available for you to read or add to wherever you are, on any device, and there is less chance of losing them.
Write by hand
Writing by hand can be quicker for some and may feel more natural than typing.
If you have a pen tablet for note taking, you can write directly into app with a stylus, with the option of converting this to text later on.
You can also use a pen to annotate PDF or Word documents when researching or reading documents.
Most note taking apps don't offer the option to write and sketch by hand, which can feel limiting to a lot of people.
Several note-taking apps that support hand-written are OneNote, Evernote, Notability, Goodnotes, Apple Notes, and Squid.
Related Posts: Drawing Pads for Annotating PDF Documents, Best iPads for Drawing, Best Android Pen Tablets.
Price
Our picks include a mix of free and paid options to meet the needs of different users; when possible, we note when free apps also include in-app purchases and what features those extra fees unlock.
When deciding which of the note-taking apps to use, consider what your needs are.
Free and simple apps will deliver a simple experience, but for more complex feature needs you should probably look to an app with a paid for subscription.
Conclusion
Taking notes is a powerful habit to build; one that can dramatically increase your productivity and your creativity.
Note-taking apps keep your information organized and help you focus on what's most important.
We highly recommend these 20 well-known note-taking apps, each with its own strengths and features.
Whether you're looking for a simple, all-in-one solution, or something more powerful and versatile, there's an app for that.
Taking notes has never been more exciting or easier! It is a good idea to try out a few different apps and see which one works best for you.
-
Best Wireless and Bluetooth Drawing Pen Tablets
Mittwoch, 27. Dezember 2023
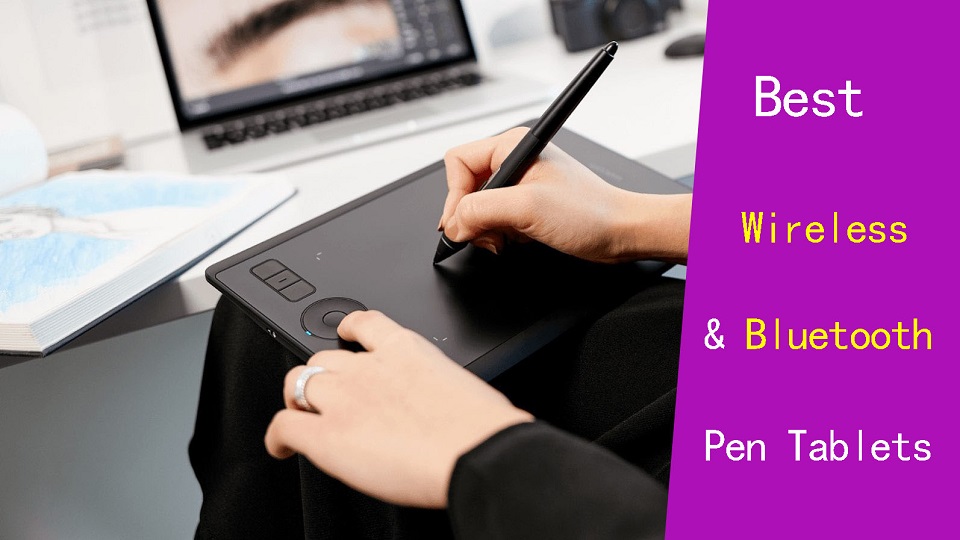
Wireless drawing tablets are great if you're trying to make a desk looks cleaner, or like drawing with your tablet on your lap.
Mobile productivity hounds who want gear that's ready for travel swear by them, too, and some models are able to be wireless, carried around by itself, and even let you draw directly on the screen.
Thanks to hyper-fast connections and long-lasting batteries, you no longer have to sacrifice some more practical functions to enjoy the freedom of using a wireless tablet.
In fact, they're so fast and reliable nowadays that even the hard-to-please artist crowd is beginning to embrace them.
These days, the pen tablet market offers plenty of wireless options, from basic non-screen units to standalone display tablets.
If you are a beginner and don't have much expertise, picking the best wireless bluetooth drawing tablets for your needs can be difficult.
In this article, we provide all the buying advice and deep-dive reviews you need to select the right wireless drawing tablet.
We've spent hours and hours researching each model, surfing the web, just to bring you a list of the very best wireless graphic tablets around.
What are the two types of wireless drawing tablets?
Bluetooth pen tablets connect with the device over Bluetooth completely wireless connection no need for a dongle.
But some wireless tablets work on 2.4 GHz radio frequency they need a dongle to insert into the USB port of the connecting device.
2.4GHz vs Bluetooth Connection: Which is Better or faster?
The answer depends on what the connection is used for, and what version of Bluetooth you're talking about.
2.4GHz will usually offer lower latency than Bluetooth but use more power.
Bluetooth technology has been refined over the years, but the older versions of it are still used for some applications. The different versions are numbered with the latest version being Bluetooth 5.
The later versions have significantly increased the transmission range as well as the speed and capacity of earlier versions.
In general, when shopping for Bluetooth drawing tablets, it's best to look for tablets using the latest version of Bluetooth.
What are the advantages of a wireless pen tablet?
Wireless drawing tablets are a great way to boost your productivity and comfort levels at work or home.
One of the main advantages of wireless pen tablets is that they eliminate the need for cables and wires that can clutter your desk and limit your movement.
With wireless connection, you can position your tablet wherever you want, as long as they are within the Bluetooth or USB range of your computer.
This gives you more flexibility to adjust your posture, angle, and distance according to your preferences and needs. You can also easily move your devices around if you need to change your location or work on different surfaces.
With no wires, there's little risk of damage or interference due to any accidental pulls or trips over cables!
And it is much easier to transport, since you don't need to worry about pesky wires and cables. This makes it perfect for people who need a mobile solution, such as students, business people, and more.
In addition, The wireless pen tablet also comes with a usb cable for easy plug-and-play in case your device doesn't have Bluetooth or the tablet itself is out of battery.
What are the disadvantages of using a wireless drawing tablet?
Wireless tablet require batteries, which can run out of juice at the most inconvenient times.
Compared to a wired tablet, Wireless tablet can sometimes have a slight delay in their response time, which maybe a disadvantage in situations where precise movements are required.
Wireless tablet can be susceptible to interference from other wireless devices, which can cause the tablet to malfunction or become unresponsive.
The final disadvantage to consider before purchasing a wireless tablet is that there are limited options on models.
Wireless tablets are still rather rare to the market so many of them are expensive and contain a lot of extra features that are not needed.
How to connect a bluetooth drawing tablet to a computer?
To connect your bluetooth tablet to a computer, first, ensure it has enough batteries.
Then, turn on the tablet and activate pairing mode, usually by pressing the "connect" or "pair" button.
Next, on your computer, go to the Bluetooth settings, search for available devices, and select your tablet from the list.
How to choose a wireless drawing tablet?
Apart from introducing a couple of new factors that you need to pay attention to (namely, connectivity and battery life), picking out the best wireless drawing tablet isn't all that different from choosing best pen tablet overall.
Wireless tablets that connect via a USB receiver or dongle can only connect to a computer or device if it has a USB-A port.
Bluetooth connectivity on the other hand does not require any dongle or extra receiver and can therefore easily connect to other Bluetooth-enabled devices without the need for any ports.
Likewise, battery life is another consideration. Be careful about what wireless tablet model you choose and how long their rechargeable lithium batteries last.
What are the 3 main types of graphic tablet? Does it support wireless connection?
In the world of graphic tablets you have three kinds: pen tablets without display, graphic tablets with display, and standalone drawing tablets.
1. graphic pen tablets
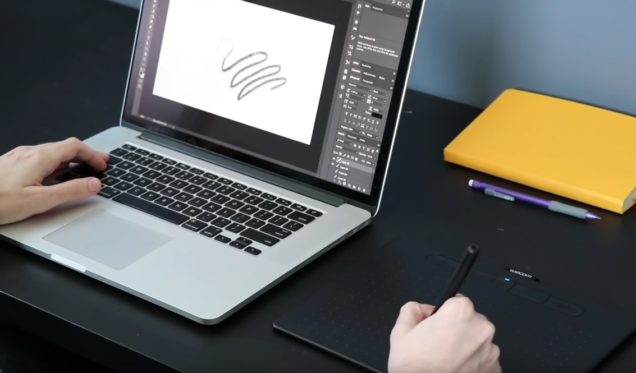
A non-screen graphic tablet consists of a pen and a plastic pad, with which you can perform various manipulations with information in various art programs.
Since your hand is on the tablet and your eyes are on a computer monitor, So screenless tablets are more difficult to use and take longer time to get used to.
They are a really good option for someone getting started in digital art. The main reasons for this is that they are much more affordable and quite durable.
This type of tablet has Wireless compatibility, You can often choose between a wireless or a wired only model.
Some of the most popular options include: Wacom Intuos, Huion Inspiroy, and XPPen Deco.
2. Pen tablets with screen
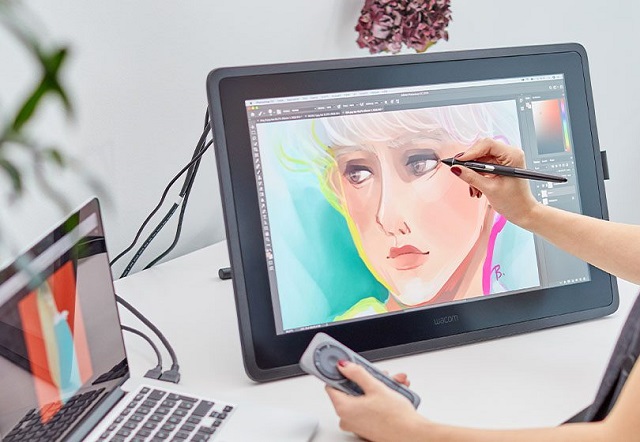
There are graphics tablets with screen available in the market. These devices are commonly referred to as "pen displays".
They combine the features of a traditional graphics tablet with the convenience of a built-in screen, allowing you to draw or design directly on the display.
There is a much smaller learning curve and it feels more natural from that perspective. However, Even if they have a display, you still need to hook them up to a computer, so not portable.
They are essentially secondary computer monitors you can draw on. These tablets doesn't have computing units like processor, RAM, storage, battery, and OS inside.
No such "wireless pen display" exists yet, as the amount of data that would need to be transferred wirelessly to get a FHD~4K display to operate unwired from an actual computer is too great.
At the top of this category are the Wacom Cintiq, Huion Kamvas and XPPen Artist. They come in all sorts of sizes with all sorts of options. Every extra, whether it be a bigger screen, or higher resolution functionality, will drive up the price point.
3. Standalone Drawing Tablets
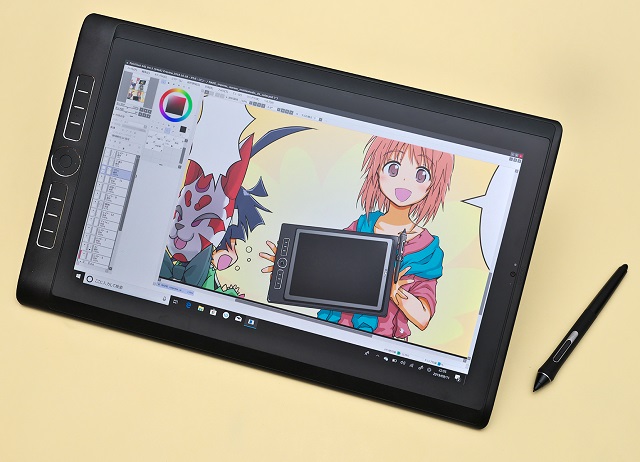
They are powerful and costly machines that act as a full workstation all their own, allowing you to draw without the aid of any extra devices.
Brands like Wacom and Huion offer Dedicated all-in-one tablet workstations (Windows 11): Wacom MobileStudio Pro 13/16, and Huion Kamvas Studio 16 — essentially display tablets with built-in PCs.
Regular consumer tablets have come a long way, Apple's ipad Pros (iPad OS), Samsung's galaxy tabs (Android), and Microsoft's Surface Pros (Windows 11), with its special attention to artistic endeavors - support pen input, has garnered a passionate following.
All these independent drawing tablets can be used wireless, and portable, making them a convenient option for artists who want to create digital art while traveling or away from a computer.
The problem is the software available is limited - especially on android and ipad os, super expensive price, the pressure points on regular consumer tablet are not as good as professional ones.
10 Best Wireless drawing tablets

Here are our top 10 picks for the best wireless drawing tablets with or without a display built in:
1. Ugee S640W
2. XP-Pen Deco MW
3. XP-Pen Deco Pro MW
4. Huion Inspiroy Dial 2
5. Huion Inspiroy Q11K V2
6. Wacom Intuos
7. Wacom Intuos Pro
8. iPad Pro
9. Samsung Galaxy Tab S9
10. Surface Pro 9
Conclusion
Want to work or play without cables getting in the way? Wireless graphics tablets are becoming increasingly popular due to their mobility and flexibility.
These 10 best Wireless tablets are in different price brackets. Each has particular benefits and a lot will depend on your budget, preference, work type and skill level.
If you have the money for it, wireless standalone tablets with screen would be the best, most natural-feeling option for a mobile solution.
It doesn't matter if you pick the iPad Pro, Samsung galaxy tab or the Surface Pro 9, you will have a wonderful machine to work with.
In case you're a beginner or an intermediate-level artist, sticking to the budget wireless screenless pen tablets is probably a good idea.
They are unbelievably affordable and will still allow you to create artwork as good as anything created with a super expensive tablet.
It's up to you to decide which one best suit you.
Source: https://pctechtest.com/best-wireless-bluetooth-graphic-tablets
-
Whats best drawing pad for Inkscape?
Montag, 25. Dezember 2023
Inkscape is a free but powerful vector graphics editor, and for the best performance, you'll want a pen tablet that can handle its requirements smoothly.
It is very hard to create or design with a mouse and a keyboard. But drawing tablets allow you to create freehand digital art the same way you would with a pencil and paper.
If you are a designer or illustrator looking for the best drawing pen tablet for Inkscape, you may be confused as there are so many different brands, models, and types on the market.
Which one is the best suits your needs or budget? What do these drawing tablet features mean? That's why we've made this article, to ensure you get the best option for you.
In this post, we'll go into the realm of tablets and take into account a variety of variables, such as display vs non-screen, pressure sensitivity, performance, software compatibility, and brand, to assist you.
What is Inkscape?
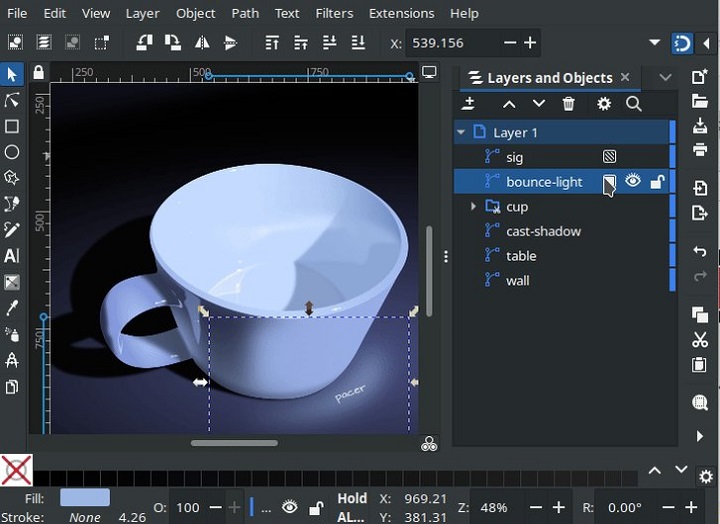
Inkscape is a great free and open source program for creating vectors (scalable graphics that won't blur when you resize them).
It offers a stable, transparent, consistent and easy-to-customize user interface, along with a wide variety of vector editing and designing tools.
Your basic toolset includes creating straight lines, freehand lines, shapes, 3D boxes, Bezier curves, spirals, text editing, and so much more.
You can add layers, color fills, and even effects to your drawing such as blurs, bevels, shadows, textures, glows, and so on.
Additionally, it includes an extension-based approach that makes it simple to add new features, and there are several incredible ones available.
The many effects and advanced, industry-grade options available in Inkscape are numerous. such as alpha blending, cloned objects and markers. It comes with multiple gradients and helps you create complex combinations too.
The items you create in Inkscape are in the SVG file format, but you can also export in PNG, OpenDocument Drawing, DXF, sk1, PDF, EPS, and PostScript.
Because Inkscape is compatible with several formats, and you can transform your designs with 3D effects, filters, pixelation, blurring and more.
You can use it to create a business card, logos, online graphics, user interface, poster, paper scrapbooking, flyer, or just to practice your skills.
Is Inkscape as good as Adobe Illustrator?
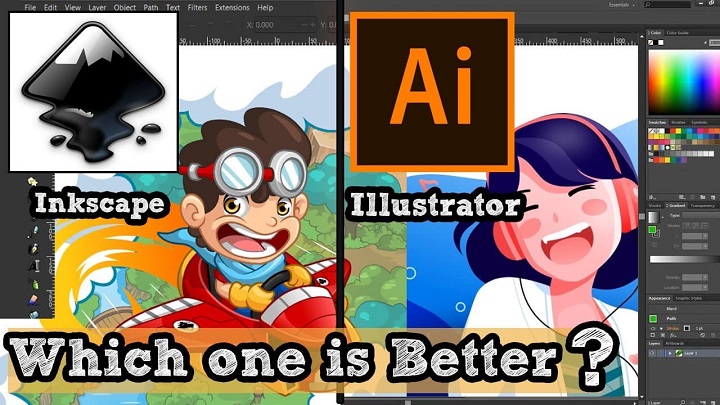
Inkscape offers a completely free way to create vector images, while Adobe Illustrator is really expensive with Subscription model.
Although not quite as feature-rich as Illustrator cc, lacks polished look, Inkscape is still exceptionally full-featured and considered as a popular alternative application to Illustrator.
The main disadvantage of Inkscape is that it does not support CMYK colours for print, It's RGB only. However you can export a design as a PDF from Inkscape, and then manually change the colors to CMYK using other free programs like Scribus.
Plus, since the software is open-source, it has a thriving user community. Along with that large community, comes many helpful Inkscape tutorials.
The designers familiar with Adobe illustrator can efficiently operate this tool. Once you get past the steep learning curve and outdated interface, you'll master this excellent software to creat stunning artwork.
Why get a Drawing Tablet for Inkscape?
A drawing pad with pen is essentially replaces a mouse while you are working with graphic design application like Inkscape.
Mouse might be faster initially but the pen tablet has some innate advantages, which once mastered can speed up your workflow very much.
A digital stylus mimics the feel of a traditional pen or a brush. You have more control in moving vectors, nodes and vertices in graphics. The whole process feels faster, smoother, more accurate, natural and intuitive.
Digital pens support both pressure sensitivity and tilt recognition when drawing. This means the on-screen brush will respond to whether you press or tilt the pen and adjust the brush accordingly. This gives a natural and accurate feel when painting.
Certain tools like the Freehand Lines tool or the Calligraphic and Brush Strokes tool in Inksape become easier to use if you have a tablet. Also, the very common task of tracing a drawing to convert it into digital is easier.
A tablet can also save you time and effort, as you can switch between different tools or menus with the hotkeys, This seems like the better choice for efficiency.
Getting from one corner of the screen to the oposite one with precision is way faster than with a trackpad / mouse and it's always in one wrist move.
Not only will drawing with a mouse produce worse results, it is also very hard on your wrists. In contrast, a tablet can reduce the risk of strain or injury on your wrist, hand, and arm, as you can adopt a more ergonomic posture and movement.
How to choose the best drawing tablet for Inkscape?
While every tablet may have comparable benefits, not all tablets are created equal—so which tablet is best for drawing & designing in Inkscape?
You need to focus on several key features and functionalities before buying, such as tablet type, tablet size, pressure sensitivity, tilt sensitivity, stylus pen, brand, price and more.
1. Types of tablets
There are three different kinds of tablets suitable for creative work: pen tablets, pen displays, and standalone pen tablets.
You'll have the opportunity to choose between a wired and wireless tablet, a screen or non-screen, when you go to purchase one.
Pen Tablets without Screen
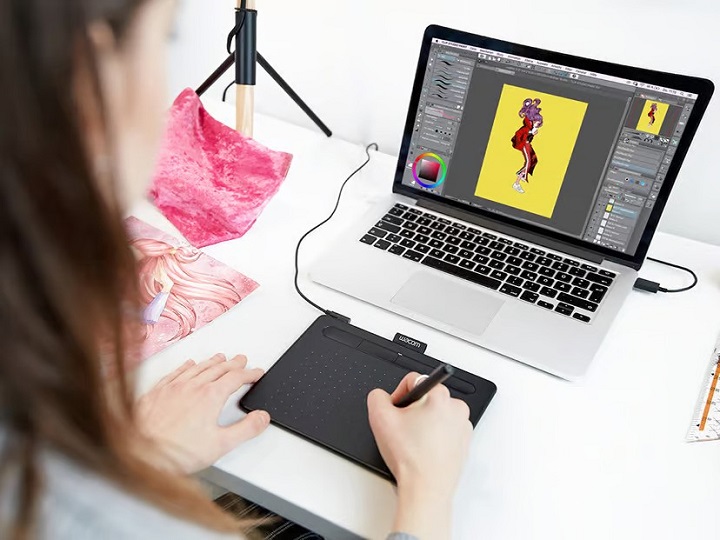
These are the most accessible and basic models, which don't include a screen, so an additional monitor would be a necessity.
The active area portion of the tablet corresponds with your screen, Drawing on the tablet with your pen registers on your computer screen.
It's a bit unnatural at first because of Hand-eye separation, but with time, patience and some practice, you will get used to it quickly.
Compared to tablets with screen, these screenless tablets are more affordable, portable, durable and have wireless compatibility.
If you want a screenless drawing pads for beginners, the Wacom Intuos, Huion Inspiroy and XPPen Deco are all good choices.
Pen Display Monitors
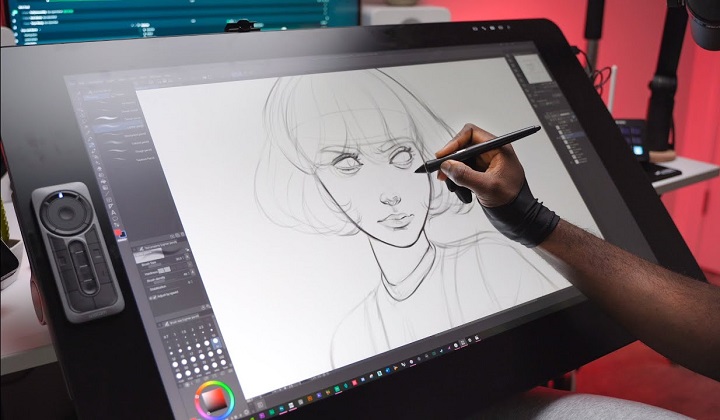
Working with the same technology as pen tablets but with the advantage of a built-in interactive display, pen displays are the favorite option of many professional artists and designers.
Pen display monitors usually come in sizes range from 10-inch to larger 32-inch. You can draw directly on the screen, exactly like draw on paper, or canvas, and it feels more natural and intuitive than non-screen type.
They do more expensive than non-screen tablets, still need a computer or a laptop to work and are not as portable as standalone tablets, however, they will considerably improve your working experience.
Buy a decent tablet with screen, the usual recommendation is the Wacom Cintiq, Huion Kamvas or XPPen Artist.
Standalone pen tablets
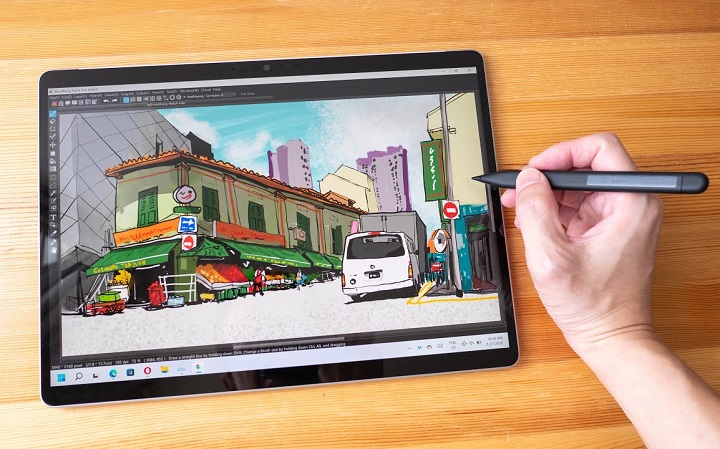
Not everyone wants a tablet as an accessory that connects to their computer.
Some prefer a standalone computer drawing pad, which has powerful internals, screen and os, a decent battery life, doesn't require a computer to operate, supports pen input.
If portability is your top concern, go for the standalone tablet. It's the best device to just pick up and draw anytime, anywhere.
Some popular options include the Apple iPad Pro (iPadOS), Samsung Galaxy tab (Android), Microsoft Surface Pro (windows), etc.
These are pretty expensive but a good option if you are earning money from your art.
2. Tablet Size
Graphic tablets come in many different sizes. The active area is the portion of the device that is sensitive to signal from a stylus. Usually, the larger sizes have a larger price tag.
Professionals prefer larger sizes while casual users find the smaller tablets sufficient for their needs.
The size of the tablet you use is largely influenced by your drawing style. People that draw with large gestural lines need a larger tablet and vice versa.
In addition, you also need to consider the size of your computer screen, working space and Portability. Larger tablets may tend to take more of your desk space and less portable.
3. Pressure Sensitivity
Pressure sensitivity means that the thickness of your brush stroke will differ depending on how hard or soft you push down the stylus on the tablet surface while drawing.
Generally, tablets have pressure levels starting from 4,096 all the way to 8,192. A higher level of pressure sensitivity allows for more precision and control when drawing.
Ideally, you'd want to find a tablet with a 8,192 pressure range if you're buying the tablet for illustration or design work.
4. Tilt Sensitivity
Tilt sensitivity on a drawing tablet refers to the ability of the tablet to detect and respond to the angle at which the stylus is held.
This allows for more natural and varied brush strokes, as the tilt of the stylus can affect the width, opacity, and other characteristics of the digital brush.
5. Express keys
More and more tablets are designed with Programmable buttons built into the tablet, usually on the side.
Instead of manually switching between tabs and apps, or simply selecting brushes in inkscape, these hotkeys will help you save time and streamline your work process.
6. Stylus
Stylus (pen) comes in two forms: battery-operated (AES) and electromagnetic resonance (EMR), but they're both designed to mimic the feel of pen on paper.
The Apple Pencil, Surface slim pen 2, along with a few third-party styluses, comes with built-in lithium battery, needs to be charged. Usually, the pen is sold separately from the already-expensive tablet.
Wacom, Huion, and XPPen and other professional drawing tablet brands, includes an EMR stylus with your purchase.These pens are battery-free, meaning it doesn't need to be charged.
7. Software Compatibility
Inkscape runs on all 3 main desktop operating system Linux, MacOS and Windows.
Thankfully, drawing tablet is designed to be used with a Windows or Mac computer, so it works seamless with Inkscape most of the time.
Note, since Inkscape isn't listed on the Google Play store and Apple app store, it won't work on any iPads and android based tablets.
So if you want a portable standalone drawing tablet for Inkscape, get a windows OS tablet, like microsft surface pro, Wacom MobileStudio Pro, and Huion Kamvas Studio 16.
8. Brand
Wacom, Huion, and XP-Pen are top 3 popular brands of graphic tablets that are used for drawing, sketching, and digital art.
Wacom is generally considered to be a high-end brand in the world of graphics tablets and they are known for their high-quality drawing experience and build quality, but they tend to be more expensive.
Huion and XP-Pen are considered as budget-friendly alternatives, they provide similar functionality and drawing experience as Wacom but at a lower cost. Many users find that they offer good value for the price.
Other less well-known brands include Ugee, GAOMON, Veikk, Xencelabs, Parblo, which also offer budget-friendly options for beginner artists and hobbyists.
If you want a more portable device for your artwork, then one of the best tablets from the likes of Apple, Microsoft and Samsung is likely to be a better option.
They offering fewer drawing-specific features but greater portability and everyday uses.
How to Use a drawing tablet with Inkscape ?
Here's a general process for using a graphics tablet in Inkscape:
Set up your graphics tablet: Connect the tablet to your computer using a cable or wirelessly, depending on the tablet model.
Install any necessary drivers or software provided by the tablet manufacturer. you can download from their official site.
Configure tablet settings: graphics tablets come with customization options, such as pressure sensitivity, buttons, or tablet mapping.
You can typically access these settings through the tablet's software. Configure the settings according to your preferences and the capabilities of your tablet.
Launch Inkscape: Launch Inkscape and create a new document, or open an existing one.
Select a drawing tool: Choose a drawing tool from the toolbar, such as the Pen tool or Pencil tool. You can also use the Brush tool or any other tool that allows you to draw or paint.
With the brush or pen tool selected, you can now start drawing on the canvas using your graphics tablet.
Customize brush settings: Inkscape provides various brush settings that you can customize to achieve different effects. You can adjust the brush size, shape, hardness, opacity, and other parameters using the brush options in the Control panel or the Brush panel.
Practice and explore: As you gain familiarity with your graphics tablet and Inkscape, continue to practice and explore different techniques to refine your digital drawing skills. Experiment with different brushes, textures, and effects to create unique artwork.
Pen Pressure not working in Inkscape ?
If you're on Windows OS and use a wacom tablet or alike, The troubleshooting solutions mentioned below should work.
Uninstall current wacom tablet driver and Install latest Wacom tablet driver.
Open Wacom settings. In the Mapping section:
Set Mode to "Pen". Then Select "Use Windows Ink".
In the Pen section:
Set Tip Feel somewhere medium-to-firm, to prevent maxing out pressure even with a light touch.
Set the function of the pen tip to "Click".
Open Inkscape, go to Edit > Input devices...
Make sure your Tablet is visible in the list of input devices.
If Tablet is not visible at all, close Inkscape, make sure the tablet is plugged in and functioning in other programs, then re-open Inkscape.
Select "Use pressure-sensitive tablet" and click Save, Restart Inkscape.
Select the Calligraphy tool (key C), From the top tool settings bar, click the icon of a down arrow pointing at a ramp. This enables pressure for this particular calligraphy preset.
Is pen tablet a must for graphic design and Inkscape?
Not every designer needs a graphics tablet, it's certainly an option, not a requirement. It depends on the type of work you will do in Inkscape and othe design programs.
If you're interested in learning graphic design and Inkscape, start with mouse and keyboard only. A majority of the functions in Inkscape is done with that only.
The tasks like web design, layout design or UI/UX design, you can do without a pen tablet. It will not make your work flow better/easier if you had one.
If you plan on making illustrations, do lineart/freehand drawing, it will be extremely time taking and difficult to do so without a graphics tablet.
Conclusion
Using a graphics tablet with Inkscape, Gimp and Krita allows you to draw, edit, sketch, and create digital artwork with more precision and control.
In fact, the suitability of drawing tablets depends on the requirements, comfort, and budget of a graphic designer.
If you're traveling a lot, working on trains, and doing a lot of sketching — a standalone tablet like microsoft surface pro might work great for you.
On the other hand, if you're primarily based at your desk, plus require pen tilt, and pressure — a tradition pen tablet and pen display might be a better choice.
Anyone who is new to graphic design, illustration, or on budget can make use of the pen tablet without screen.
If you want to step up your comfort level of drawing, a tablet with screen is the go-to choice for you.
Source: https://pctechtest.com/best-drawing-tablet-for-inkscape
-
Help choosing a Pen tablet for Affinity Designer & Photo
Samstag, 23. Dezember 2023

With their affordability and no subscription fees, Affinity Designer and Photo are great options for graphic designers on a budget.
The main difference between the two programs is that Affinity Photo is focused on raster image editing while Affinity Designer is mainly used for vector-based design work.
If you've ever tried to learn how to draw in Affinity Photo and Designer, probably you've heard about graphics tablets and that you can't really draw digitally without one.
A mouse can only do so much, A graphics tablet with pen can help you organically draw over your illustrations and take your photo editing skills to the next level.
Finding the best drawing tablet for Affinity Photo and Affinity Designer can be a little difficult, because of an abundance of choices available in the market.
In this article, we will explore the important characteristics that are desirable if you would like to buy any tablet to be used with Affinity Photo and Designer software.
What is the difference between Affinity Photo and Affinity Designer?

These are two powerful pieces of software from the same family, and share a lot of features, but they serve different purposes.
Affinity Photo is a raster graphics photo editor specifically designed for digital photography, while Affinity Designer is a vector graphics editor suited to illustrations, line art, UI design and web design.
In terms of features, Affinity Photo offers sophisticated image processing tools such as RAW editing capabilities, tone mapping, HDR merging, panoramic stitching and retouching tools. It also has dedicated layers and masking tools that make it perfect for advanced photo manipulation.
Affinity Designer provides professional vector drawing tools with editable text paths and shapes plus support for SVG export. You'll also find awesome features like the ‘Pen Tool' to create custom curved paths, advanced path manipulation and bezier curves.
Whether you choose Affinity Photo or Affinity Designer will depend on the type of work you want to do, but both are extremely powerful art software that provide all the tools necessary for professional-level results.
Why get a drawing tablet for Affinity Photo and Designer ?
As graphic designers we're accustomed to designing with a keyboard and mouse, but sometimes a task or design requires the precision of a freehand tool, and this is where a drawing tablet comes in handy.
Precision & Sensitivity: Unlike the mouse, drawing tablets are designed to capture the subtle nuances of pressure, tilt, and direction.
Both Affinity Photo and Designer applications support stylus pressure to vary a property such as stroke weight as you draw.
Natural Drawing Experience: drawing tablets, especially pen displays, with natural strokes and gestures, Emulating the tactile feel of paper, these devices bridge the gap between traditional and digital mediums.
A mouse can never mimic a pen or brush the way a graphics tablet can, as you have to rely on clicks and drags.
Customizable Workflow: Graphics Tablets often come with customizable shortcut buttons, optimizing the design process.
These can give you quick access to things like colors and rotations, if you map them to the corresponding functions in your application.
Ergonomic Comfort: Long hours become less taxing with ergonomically designed pen tablets that prioritize the user's comfort.
While mouse is used in one hand position that's put some strain and hurts on it, and can be get your hand cramped if used for a long time.
Efficiency: A mouse uses a relative coordinate system; the pointer only moves relative to where the mouse was sitting before you pushed it.
A pen tablet uses absolute coordinates by default; the cursor jumps immediately to the tablet coordinates where you land the stylus.
Since graphics tablet allows you to point at any point of the screen very fast, it cannot just make you draw or retouch comfortably, but faster as well.
Personalization: Modern tablets and displays allow users to adjust settings to suit their unique style and preferences.
How to choose a tablet for Affinity Photo and Designer ?
If you're thinking about getting a drawing tablet to use with Affinity Photo or Designer, these simple tips will help you choosing your Tablet a lot better.
1. Tablet Types
You have basically three choices: a pen tablet, a pen display, or a standalone tablet.
Pen Tablets without screen
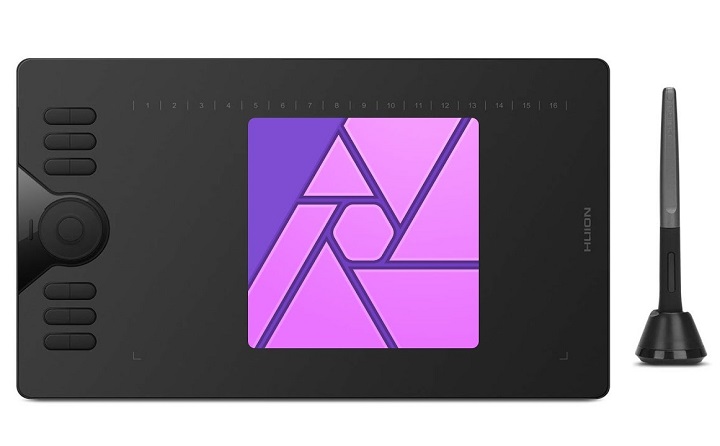
Pen tablets come in the form of a thin flat surface that corresponds to a computer screen. The matching stylus or pen is used for input and to control the movement of the cursor.
You look at your computer screen while drawing on the tablet surface, this takes a while to get used to, require great hand eye coordination.
Non-screen graphics tablets for starers are generally more portable, durable and cost-effective than screen tablets.
Tablets like Wacom Intuos, Huion Inspiroy and XP-Pen Deco series offer a range of sizes and features in this category.
Drawing Tablets with screen
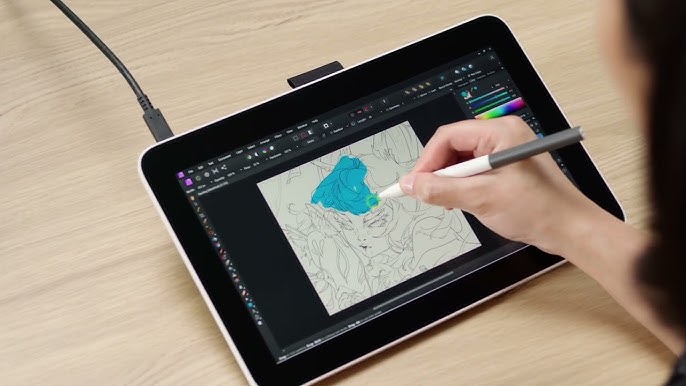
Drawing pads with screen, commonly referred to as pen displays, allow users to draw directly onto the screen.
This immediate visual feedback fosters a more intuitive and natural drawing experience, mimicking traditional pen and paper.
These tablets often come in various sizes, resolutions, and sensitivity levels, catering to different user preferences and professional requirements.
Tablets like Wacom Cintiq, Huion Kamvas and XP-Pen Artist are popular options in this category.
Standalone Pen Tablets
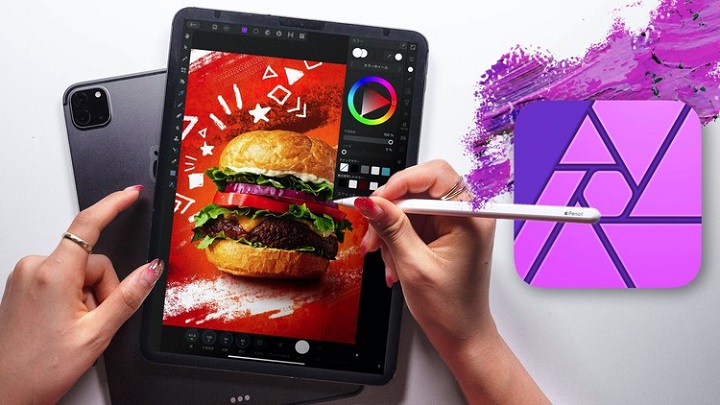
Both of two types above need to be plugged in a computer to work. Standalone graphics pads like ipads allow you to draw on the screen, they don't need to be attached to a computer.
This type of tablet is compact, light and cordless, it's easy to hold, manipulate and portable to carry.
You can use them while doing small drawing project or when on a trip. However, this device can be a little expensive for designers.
2. Tablet Size
Generally a smaller tablet area needs less pen movements but more portable whereas a larger tablet area requires accordingly longer ways for the pen.
However, If the tablet is too small, then it turns to get useless because you will feel a little cramped and can't work precisely.
3. Pressure sensitivity
Pressure sensitivity determines how much you can vary the width of the lines you paint.
This is done by applying different pressure on the tablet surface.
The more pressure sensitivity a graphics tablet has. The more you will be able to vary the size of your strokes with pressure.
Most modern tablets range from 4,096 to 8,192 levels of sensitivity, the more the better.
4. Tilt sensitivity
Tilt Sensitivity, or Tilt recognition is a digital tablet feature that allows the device to perceive the angle of the digital pen over the tablet surface.
This is pretty useful, as it allows you to create more realistic and natural brushstrokes, getting closer to the behaviour of a real pencil.
5. Stylus Pen
The Apple Pencil, surface slim pen 2, along with a few third-party styluses, comes with built-in lithium battery, needs to be charged. Plus, you'll need to purchase these separately.
Wacom, Huion, XP-Pen and other professional drawing tablet brands, includes a stylus with your purchase. Moreover, these pens are battery-free, so there's no charging needed and you can use them anytime, anywhere.
6. Brand
One of the best brands overall for drawing tablets is the Wacom brand. Wacom specializes in tablets and provide a large range of products from items for professionals to beginners.
Wacom Pen tablets are high quality but very pricy, numerous competitors have emerged over the past decade, several of whom like huion and xp-pen now offer great options that provide similar performance for much less money.
As for Standalone Tablets, The leading examples fall into three main ranges: Samsung's Galaxy Tab (Android), Apple's iPad Pro and Microsoft's Surface Pro (Windows). There are alternatives, but these are the best.
7. Operating System Compatibility
Affinity Designer and Affinity Photo are both available for Windows and MacOS, as well as iPadOS. There is no Android, chrome OS and Linux version.
Luckily, Almost all drawing tablets are compatible with both Windows and Mac OS devices, so don't need to worry about that.
Plus if you want to use a standalone tablet, you will either need to get a windows tablet (surface pro) or an iPad.
How to Use drawing tablet with Affinity Photo and Designer ?
After connecting the pen tablet, the correct drivers must be installed. Because it allows your computer to interact with pen tablet.
Look for the drivers made for your individual model on the manufacturer's website. Restarting the computer after that is also important!
The tablet should function once the drivers have been installed. For example, the cursor should move in sync with the pen's tip.
The tablet driver also allows you to map whether the range of the pen input (as a mouse) is mapped to a single screen or to all screens. It also allows you to customize the buttons on the tablet.
In addition, A number of Affinity tools and settings can be used to provide perfect precision when using a pen tablet.
When drawing with a pen tablet, the Pen Tool, Vector Brush Tool and Pencil Tool stroke's variable width lines will automatically match the level of pressure applied. This can be controlled by adjusting the pressure sensitivity or pressure profile settings.
When using the Paint Brush Tool, a number of controller options on the Brushes panel can also be adjusted to work alongside your tablet pen.
Pen Pressure not working in Affinity Photo or Designer ?
If you're on Windows OS, The troubleshooting solutions mentioned below should work regardless of the brand of your tablet, e.g. Wacom, Huion, XPPen, Ugee, Parblo, Veikk, Xencelabs, Gaomon, etc.
1. Disable Windows Ink
Affinity Photo or designer's default settings requires Windows Ink enabled for pressure sensitivity to work. You can choose to have Affinity Photo or designer not use Windows Ink.
In the tablet driver's settings, under Tablet Input Method, disable Windows Ink and choose "High Precision" in Affinity as Tablet input preferences. Restart Affinity Photo or designer.
To choose "High Precision" in Affinity software, From the Edit menu in Affinity Photo or Designer, select Preferences.
On the Tools tab, under Tablet input method, select one of the 3 available input methods: Low Precision, High Precision, and Windows Ink.
2. Enable Windows Ink
This solution is the opposite of the earlier fix.
In your tablet driver's settings, enable Windows Ink under the pen settings.
Then select "Windows Ink" in Affinity as Tablet input preferences. Restart Affinity Photo or designer.
When Windows Ink is enabled, text cannot be selected with cursor, clicking on icons on the taskbar doesn't do anything, scroll bar's movement is reversed.
This solution is not as good as first one due to Windows Ink behaviour with other tasks.
Do you need a drawing tablet for affinity publisher?
Affinity Publisher is a powerful software for desktop publishing, which allows users to create stunning layouts and designs for print or digital media.
If you are mainly using Affinity Publisher, InDesign or other software, to make the layouts, in this case you may not need a graphic tablet.
Conclusion
As an artist or a designer, the tools that you use are important.
A drawing tablet allow you to seamlessly use the Affinity Photo and designer, allowing a level of precision and versatility that a mouse can't achieve.
Many artists enjoy using digital pen to create wonderful works of art along with editing pictures easily.
There are plenty of options out there for artists. It all boils down to what your preferences, needs and budget are.
If you've got a small budget to start with, pick something cheaper from our list and start with that.
As you grow, you can upgrade to something a little more loaded with features.
Source: https://pctechtest.com/drawing-tablet-for-affinity-photo-and-designer
-
XPPen Artist 24 Pro vs Wacom Cintiq Pro 24 Comparison
Dienstag, 12. Dezember 2023
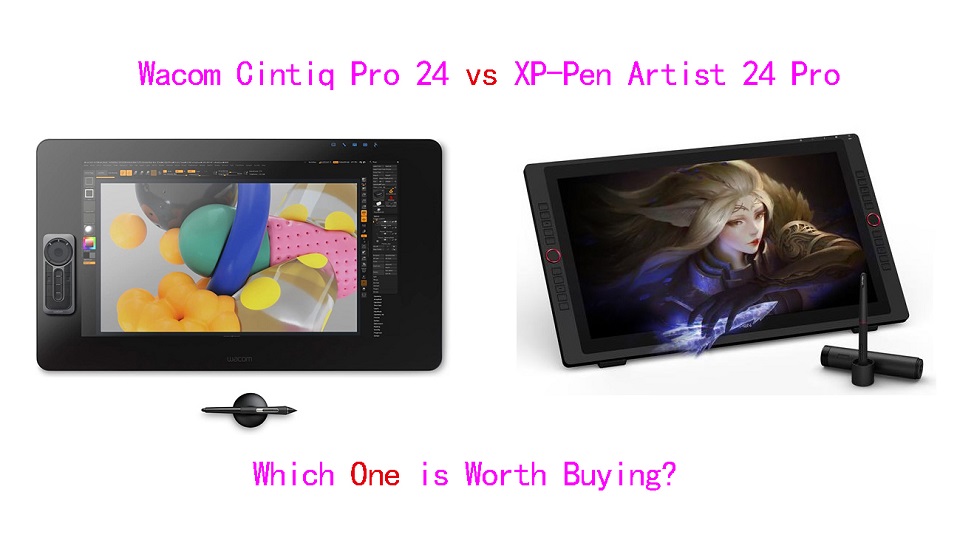
Want to get serious about digital art? Want to upgrade from a non-screen tablet, a small pen display, or an old wacom cintiq model?
The 24-inch pen display monitor is a great tool for professionals and mid-level artists who want to take painting to the next level and draw directly on the big screen.
XP-Pen Artist 24 Pro is what many artists calls a budget alternative to the Wacom Cintiq Pro 24—a much more expensive and feature-rich tablet for the pro market.
Which one has better screen quality, best drawing experience & longer life span? and Which one is worth buying? Is Wacom Cintiq really better than XP-Pen Artist?
In this article, we would discuss the key differences between them and help you decide which one will fit your needs better.
Wacom Cintiq Pro 24 vs XPPen Artist 24 Pro Comparison– which one is worth buying?
Taking a closer look at the specifications of the two tablets, it gets easy to spot the key differences between them.
Below is a more in-depth analysis, These will help us better understand the pros and cons in each case.
Design and Build Quality
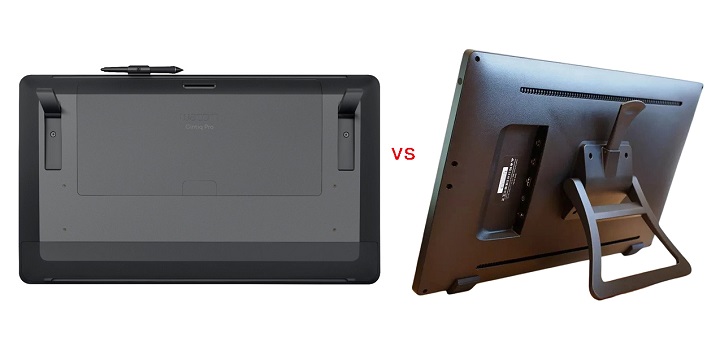
XP-Pen Artist 24 Pro is composed of a vast 23.8-inch glass screen, side buttons and an immense adjustable stand. Build quality is great and doesn't look and feel cheap.
The massive Wacom Cintiq Pro 24 feels robustly built and features a clean “minimalist” design aesthetic. You will notice that there is a lot of empty space around the 23.6-inch screen (bezels).
This leads to the tablet taking a lot more space on your table. But it's also incredibly comfortable to lay your arm on, and you can travel the full surface of the display without interrupting your pen stroke.
Cintiq Pro 24 has no ExpressKeys built into the sides like the Artist 24 Pro does. It also doesn't include an adjustable stand instead 2 folding legs at the back that will raise it up to a 20 degree angle.
Both tablets are big and heavy, less portable. If you're going to invest into a graphics tablet this size, make sure you have sufficient desk space to accommodate it.
Screen Resolution, Brightness and Color Gamut
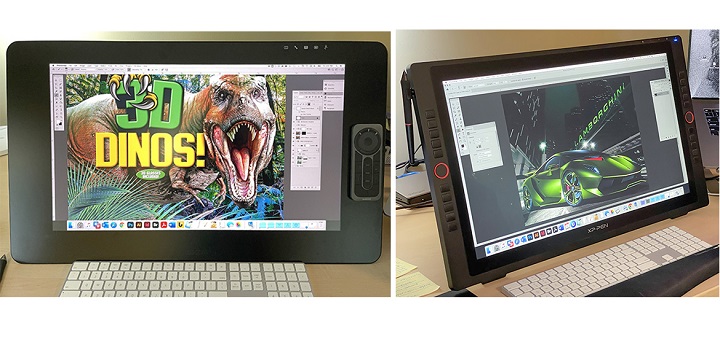
Artist 24 Pro features an IPS display with 2K (2,560 x 1,440-pixel) resolution at 123 PPI, 250 nits max brightness, 16.7M colors and 90% Adobe RGB color gamut.
The screen looks nice and sharp, Colors are bright and vibrant. you can zoom around and work on the small details of your art.
However, the Cintiq pro 24's display offers higher 4K (3840×2160-pixel) resolution at 188 PPI, a billion colors, 350 nits max brightness, and covers a wider color accuracy of 99% Adobe RGB.
This means sharper and truer color representations illustrations, photographs, and video on Cintiq Pro 24.
In addition, Wacom Cintiq Pro 24 comes with a screen calibrated in the factory, meaning that you don't have to mess around with calibration hardware.
You will likely need to perform some calibration with the XPPen Artist 24 Pro, the same as you would for a monitor.
Screen Lamination
Cintiq Pro 24's screen is fully laminated, This means an improved display quality, reduced glare, wider viewer angle, more accuracy (no cursor offset/parallax from the pen tip), and better overall usability or user experience.
In contrast, Artist 24 Pro does not come with a laminated screen, But parallax is improved with newer screen technology, which is very minimal. After calibration, you can get the pen cursor to appear directly beneath the pen tip.
Surface Texture
Surface texture makes a huge difference in your drawing experience.
This is one of the main differences between the two tablets.
Cintiq Pro 24 has a matte etched glass surface, whereas the Artist 24 Pro uses a matte screen protector.
The etched glass will have a bit more paper-like texture, and even less slippery. Matte screen protectors are less durable, and have a much slicker feel.
Multi-Touch
It is worth noting that the XPPen Artist 24 Pro is not a touch screen.
There are two models of the Cintiq Pro 24, with and without multi-touch. The touch version costs $500 more than its sibling.
The most useful gestures were two-finger actions: pinch to zoom in / out and rotating the canvas. These two commands worked almost flawlessly.
But any action that required more than two or three fingers became quite cumbersome. of course you can always disable them by press the button.
Wacom Pro Pen 2 vs XPPen PA2 Stylus
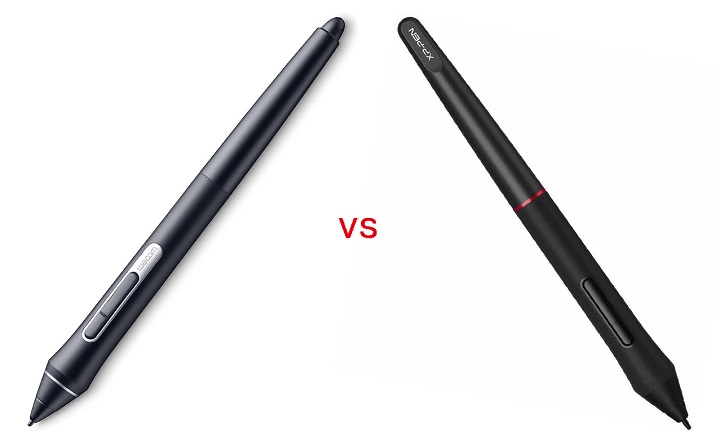
Wacom Pro Pen 2 and the XPPen PA2 stylus look very similar to each other. They both have a rubber grip at the front body for a better hold.
Wacom pen has two buttons on the side and an eraser at the back whereas XPPen stylus has two side buttons with no eraser at the back.
XPPen Pa2 stylus is light and more front heavy. Wacom pen is more back heavy and more heavily weighted in general.
Both styluses are battery-free, doesn't require charging, supports 8,192 levels of pressure sensitivity and 60 degrees of tilt recognition.
This means that it's easy to draw a line that smoothly varies between thick and thin as pressure is applied—or not—much like a brush.
The main difference was that XPPen PA2 stylus seems to take slightly more initial activation force than Wacom to draw, Tilt sensitivity is also sometimes a bit flaky.
In contrast, Wacom Pro Pen 2 feels more natural and accurate, it responds more predictably to the pressure you apply to it.
Overall the XPPen PA2 is a good stylus, but the Wacom Pen offers better drawing experience.
Shortcut Buttons
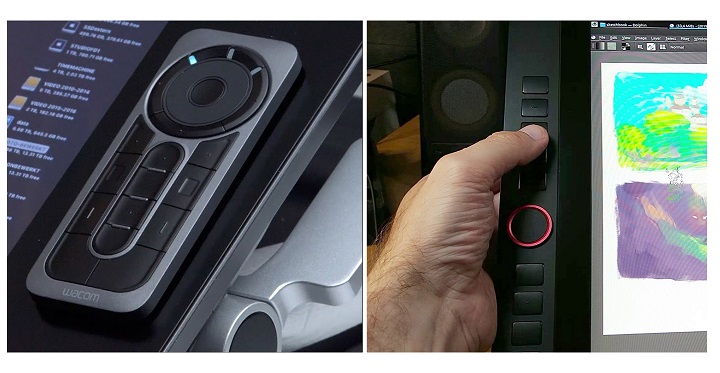
The Artist 24 Pro has two sets of keys, a red roller wheel and ten buttons on each side, making life equally convenient for lefties, righties, and the ambidextrous.
They mirror each other, so there are a total of 20 programmable keys and 2 dials. These are all on the outside, slightly raised.
The Cintiq Pro 24 has no Express Keys, But it comes with a wireless Express Key Remote via 2.4GHz Wifi.
This hand-held device provides 17 programmable shortcut function keys while working. There's a rotation wheel at the top that allows zooming in and out (or other customizable functions).
The remote is perfectly balanced for either right or left-handed people. It will magnetically stick to either side of the display keeping it handy at all times.
Compatibility and Connectivity
Both Cintiq Pro 24 and Artist 24 Pro are compatible with the popular operating systems Windows, Mac and Linux. They works well with a multitude of software packages that range from popular professional suites such as Photoshop and ZBrush, to freeware such as Krita and Blender.
The Cintiq Pro 24 and Artist 24 Pro can be connected as a display through HDMI, or USB-C, if your computer supports the ports.
If you are connecting the display through HDMI, you'll also need to connect one cable for power, and an additional USB-A cable for the pen data transmission, total 3.
The USB-C connection only requires 2 cables: a single USB-C cable + one cable for power.
Drivers & Software
Both units come with windows, mac and linux drivers to communicate with your computer. You need to download them from their official site.
The driver from Wacom is one of the most reliable options on the market. It comes with some advanced shortcut controls that are easy to understand and quick to setup.
The driver from XPPen may not be as advanced as the Wacom driver and may count more issues in some cases. but nothing you couldn't work around or just ignore.
XPPen driver has plenty of customization options. You can use it to customize physical shortcut buttons, calibrate the onslaught of the pen and screen, set the work area and export / import your settings.
Something we did notice is that both Wacom and XPPen driver software have 3-point calibration for the stylus' pressure sensitivity, which is great to get your pressure just right.
Tablet Stand & VESA Mount
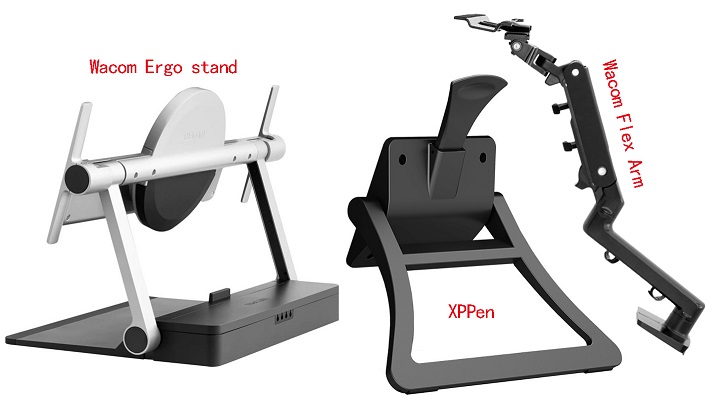
The size of these 2 tablets are massive, so be prepared to make a bit of desk space available.
If you don't have much desk space, you might need to buy a VESA mount or arm to hold up the monitor in a comfortable position to draw on.
Artist 24 Pro's adjustable stand is strong, wobble-free, and already attached. Both the stand and bottom of the display have rubber feet to help prevent slipping on a desktop—a thoughtful touch.
The stand uses a standard 100 x 100 mm VESA mount, so it can be easily removed for attaching the display to a VESA arm mount if desired.
Even though Cintiq 24 Pro does come with the 2 legs to help prop it up, it’s still not enough. Having to hunch over when you draw/animate does numbers on your back.
Luckily, An optional $500 Wacom Ergo stand or $400 Wacom Flex Arm is available - It has an unique 80x495mm hole pattern at the back.
Wacom Ergo stand has raise, tilt and rotate mechanisms for adjustable positioning, so you can change angles easily while working on complex illustrations.
The Flex Arm allows the Cintiq Pro 24 to be positioned just about anywhere you want at any angle you want.
Wacom Pen Stand vs XP-Pen Pen Holder
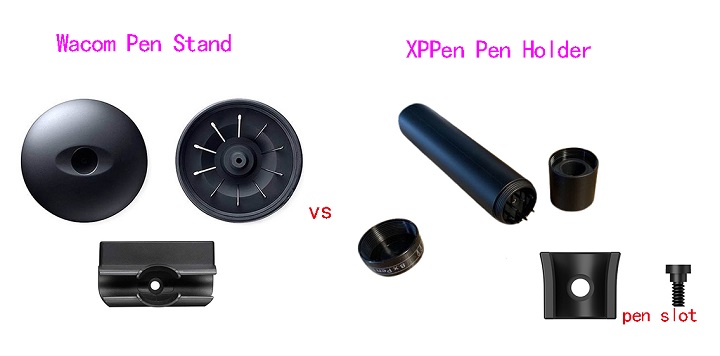
Cintiq Pro 24, comes with a pen stand, which is shaped like a donut. It allows you to keep your stylus in a horizontal or vertical position when not in use.
Opening the top cover you get a total of 10 extra pen tips: 6 standard and 4 felt. There's also an extra pen holder that snaps to the top of the display.
With Artist 24 Pro, you get a cylindrical pen holder, which works as a pen storage.
The front cap of the pen holder works as a pen stand, while the rear cap of the pen holder provides safe storage space for 8 extra standard Pen nibs.
There's also a small plastic pen slot that screws into the side of the tablet to hold the stylus safely.
Cooling
There is an intermittent fan regulates the temperature of the Cintiq 24 Pro. The fan speed varies depending on the demands placed upon the monitor. Fan is quite loud at times.
XPPen Artist 24 Pro has no fans, so it is quiet with zero fan noise, which will certainly help users stay concentrated without the droning.
Price
The Artist 24 Pro retails for about $899 USD and Wacom's Cintiq Pro 24 sells for $1,999! That's quite the price jump to account for.
So let's just get this right out in the open. There are a lot of people who are looking for cintiq alternatives as Wacom's tablets are expensive.
Besides,The Huion Kamvas Pro 24 (4K) with cheaper price is also really excellent and almost as good as wacom cintiq Pro 24.
Related Posts: XPPen Artist 22R Pro vs Wacom Cintiq 22 Comparison, Wacom Cintiq Alternatives, PDF Annotating Tablets.
Conclusion
While it may be bigger than you'd need, The 24-inch pen display is generous enough to feel the freedom of drawing and move your hand with the pen around the screen without any problem.
The Wacom Cintiq Pro 24 simply outdoes the XP-Pen Artist 24 Pro in all aspects because it offers extra features like multi-touch, higher pixel density, longer warranty - 2 vs 1 year, etc.
Only downside is that it's expensive. If you're a serious artist, designer or 3D modeller, and money is no object, you'll struggle to do better than the Wacom Cintiq Pro 24.
The XP-Pen Artist 24 Pro offers amazing value for the money, with everything you'd need to take the next big step in their creative journey. And the price is more than acceptable for most artists.
Ultimately, It really depends on your budget, preference, needs and skill levels. We noticed that for many beginner artists using the Cintiq Pro 24 is unnecessary. Some of them don't even use the advaned features.
We look forward to seeing how Wacom, and XP-Pen will continue to grow their product line with graphic displays that can attract larger demographics.
Source: https://pctechtest.com/wacom-cintiq-pro-24-vs-xppen-artist-24-pro
-
Huion Kamvas Pro 24 vs Wacom Cintiq Pro 24 Comparison
Sonntag, 10. Dezember 2023
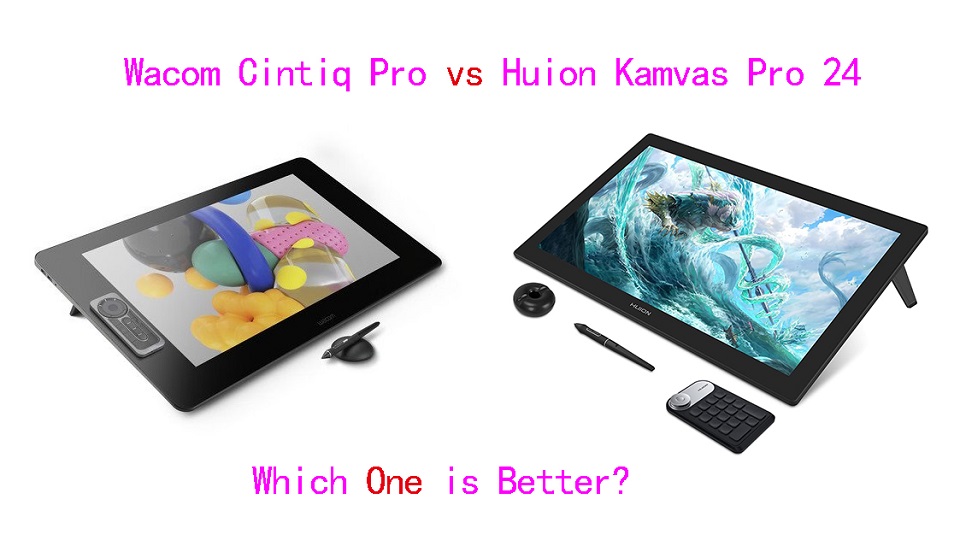
If you're a pro and do art on the computer, you need a drawing tablet with screen. But a small pen display feels cramped for drawing larger images, requiring a lot of zooming.
There is something really cool to having a giant display tablet to draw on, Which gives you a lot of drawing area to draw to your heart content.
If you have the budget, getting a 24-inch pen display would be terrific. Whether you draw with your wrist or with your arm, this drawing area is more than enough for you for the most part.
Far and away, the biggest name in the drawing tablet space is Wacom and the Cintiq Pro 24 is the Rolls-Royce of display drawing tablets.
Huion usually covers the budget-end of the graphics tablet market, and the Huion tablet that most closely competes with the Cintiq Pro 24 is the popular Kamvas Pro 24 which supports 4K.
Despite how the two device appears too similar, there are quite many differences between them.
One may be wondering whether getting the more affordable Kamvas Pro 24 is the best choice, or whether you will need or benefit from the more features Cintiq Pro 24 offers.
Wacom Cintiq Pro 24 vs Huion Kamvas Pro 24 Comparison: What are the main differences?
In this article, we did a detailed side by side analysis – comparing every single major and minor detail of the tablet. then you will know exactly which tablet is the best on your own.
We will look at the design, some of the specs & screen resolution, the pen, including pen pressure sensitivity, screen parallax, drivers, price and much more.
Design and Build Quality
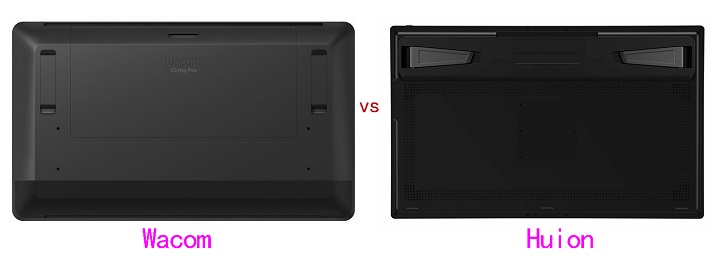
When it comes to design both the tablet follows a minimalistic design, feels strong and sturdy. The tablet itself is all black quality plastic with a front glass screen.
The different thing is the overall size. The Wacom is bigger - it has a lot more bezel area around the screen. The one on the Huion is a lot smaller and looks more like a monitor.
After using both it is better to have that larger bezel area around the screen to rest your hand on when drawing near the edge.
On the tablet back you have two fold-out tablet legs, VESA mount as well as a number of ports for connectivity.
The main con of a Cintiq pro 24 or a Kamvas Pro 24 is its weight and bulk. Both devices are quite heavy and big —especially compared to smaller pen display, so less portable.
Screen Size and Resolution
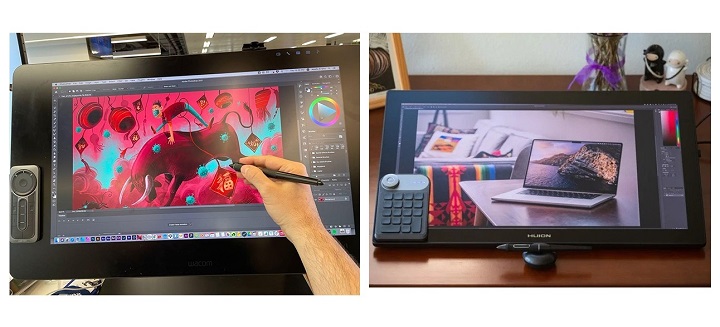
With the Cintiq Pro 24 and Kamvas Pro 24 you're getting a 24 inch diagonal screen at full 4K UHD (3840x2160-pixel) resolution.
At a whopping 188 pixels per inch, the pixels is small and densely packed and you won't see individual pixels when you work (draw) up close to the screen.
If you're using a 24-inch screen with 1080p resolution for detailed drawing then you'll be distracted by how jaggedy your lines look.
In Comparison, having this 4K resolution does make a big difference, it's much crisper and feels great to see your artwork.
Plus, 2160P screen has significantly more canvas space compared to 1080P, This is great for productivity. You can place a reference photo by the side and still have enough canvas space to draw with.
Screen panel and Color Gamut
With IPS Panel, Cintiq pro 24 have excellent 99% Adobe RGB color gamut, 1000:1 contrast ratio, a billion colours, and the colors do look good right out of the box.
Kamvas Pro 24 uses the QLED technique to increase the color gamut to 102% Adobe RGB (140% sRGB), 1200:1 contrast ratio, 1.07 billion (10bit) colors for a more vibrant and saturated color on the display.
You may find that the colors on Kamvas Pro 24 are very oversaturated but not accurate, you should invest in a colorimeter to calibrate the screen. That said, the most accurate colors are not necessarily the most vivid.
Wacom Cintiq is designed to deliver the most accurate colors instead of over saturated vibrant ones so that when your work is viewed on other peoples' screens, it looks similar to what you, the artist, intended.
Screen Lamination
Both the tablets come with the exact same laminated screen, which means less parallax while drawing.
To give you an idea on what that is, Laminated screen is the screen that's made so that the top glass, digitizer, and the display are made of one flat piece.
This offers multiple advantages over non-laminated screens: preventing dust from getting under the screen glass, as well as having a thinner display. The most notable one is the reduced parallax.
Drawing Surface
Both Cintiq Pro 24 and Kamvas Pro 24 has an etched glass surface that gives the pen a slight tactility when drawing on it that would not be there if the screen were glossy.
You will also appreciated the glare reduction on the matte etched screen, which prevented the light from obstructing your vision.
In contrast, glossy screens reflect the world around them, which can be distracting and distort color accuracy unless you are working in a dark room.
Multi-Touch
The Cintiq Pro 24 comes in two variants – one with multitouch and one without it. You will have to pay extra for this feature.
The Huion Kamvas Pro 24, on the other hand, does not come with any touch support – whatsoever.
Being able to perform shortcuts such as zoom, pan, scroll and rotate using touch-based gestures can be very convenient.
But Multitouch support on the Cintiq Pro 24 is pretty terrible. Its palm rejection is bad and the overall touch experience feels laggy and unreliable.
Most artists simple choose the tablet without the multitouch or just stop using it after a while.
Wacom Pro Pen 2 vs Huion PW517 Stylus
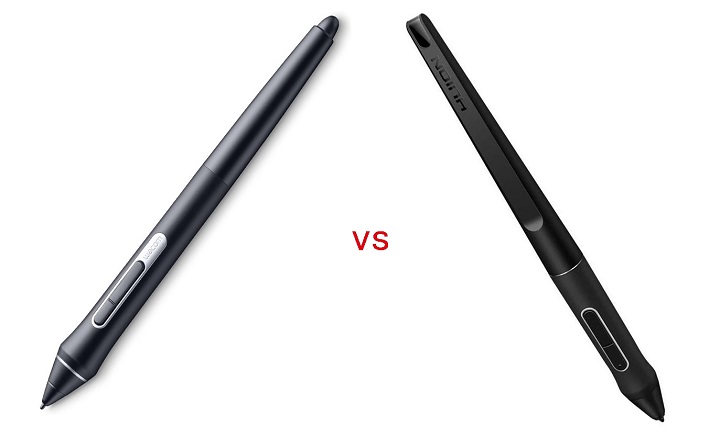
Both the Cintiq Pro 24 and Kamvas Pro 24 comes with a very comparable stylus. They have two buttons on the side and a soft rubber grip at the front half.
But Wacom Pro pen 2 has an eraser at the back whereas Huion PW517 stylus doesn't have an eraser at the back.
They are battery-free, comes with 8192 levels of pressure sensitivity, 60 degrees of tilt recognition, fast response time and accurate tracking that provide an equally good drawing experience.
However, The Huion PW517 pen has a higher Initial Activation Force than Wacom pro pen 2. It require you to press down ever so slightly more to get it to register.
In addition, The tilt of Huion stylus can cause the cursor to move a little when you don't want it to and it can be really annoying.
Overall Huion stylus is good, but the Wacom Pen is the best.
Tablet Stand & VESA Mount
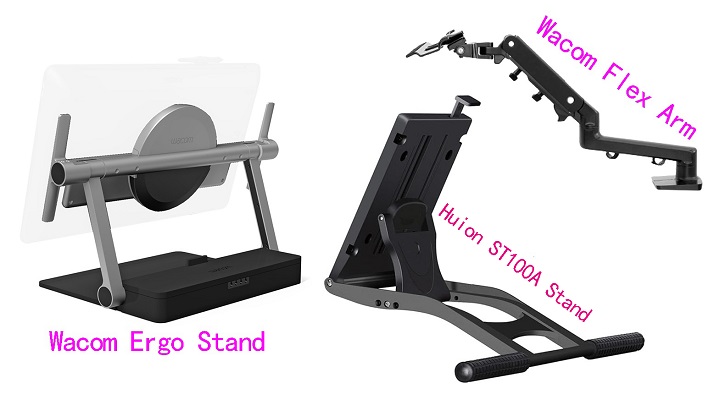
The fold-out feet of both tablets can only prop up the pen display at a fixed angle of 20°, If you want a comfortable angle to work with for drawing, then you will need a proper stand.
The back of the Kamvas Pro 24 comes with a 100 x 100mm standard VESA mounting holes, it's compatible with a wide variety of arms, stands, and brackets.
Unfortunately, Cintiq Pro 24 can't be mounted with VESA mount, as it has a weird 80x495mm hole pattern, which only supports Wacom's own stand.
The Huion ST100A multi-adjustable stand is an extra-cost option ($49.99)—highly recommended.
Wacom has two options with the Ergo Stand and the Wacom Flex Arm, with both compatible with the Cintiq Pro 24.
Wacom's stands are a bit expensive for some artist, the Ergo stand retails for $500 alone, and the Wacom Flex Arm retails for $379.
Wacom Expresskey Remote vs Huion Keydial Mini K20
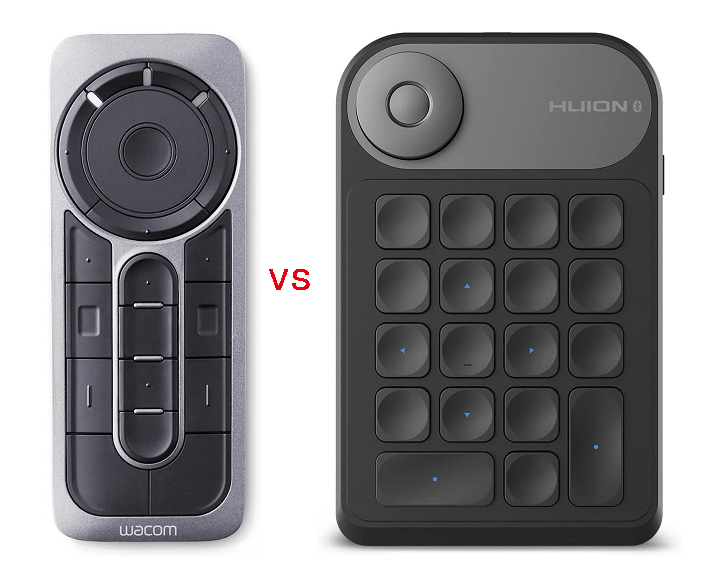
Neither display comes with built-in express keys, and instead including their handy express key remote.
Both will magnetically stick to either side of the display keeping it handy at all times. This is more flexible, allowing you to freely place it on the screen or the desktop.
Wacom's Expresskey remote has a total of 17 buttons and a touch ring. It connects wirelessly via 2.4GHz Wifi to the computer.
The Huion's mini keydial K20 remote has a similar design to the Wacom with 18 buttons on the bottom, and a circular button on the top. But It connects wirelessly via bluetooth to the computer.
All the buttons on both Expresskey remotes can be assigned to any shortcut of your choice, making the workflow more fluid. It works across all the drawing, editing and modeling programs.
Pen Holder
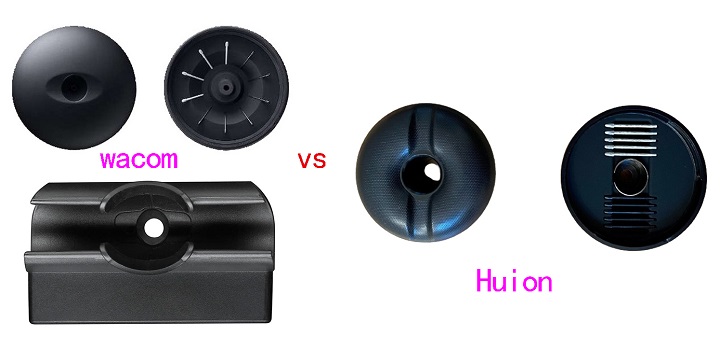
The Wacom Cintiq Pro 24 has a pen stand that holds 10 extra pen nibs (they do wear down with use, 6 standard, 4 felt). There's also an extra pen holder that snaps to the top of the display.
As for Huion, The doughnut-shaped pen holder is a secure place to keep the pencil when not in use, and it contains ten extra pen nibs, of which five are felt nibs intended to simulate drawing on paper.
Compatibility and Connectivity
Both Cintiq pro 24 and Kamvas pro 24 are compatible with various operating systems, including MacOS, Windows and Linux. They also works with a range of software including programs from Adobe, Autodesk, Affinity, Corel and more.
Cintiq Pro 24's Connectivity is excellent. You'll find twin USB-A ports on its right and left sides, plus a standard 3.5mm audio jack and full-sized SD card slot. Round the back is USB-C port plus HDMI, and DisplayPort connectors.
Several connectivity options are lined up on the back of the Kamvas Pro 24, such as USB-C, Display Port, and HDMI. It also equipped with two USB-A ports and a 3.5mm headphone jack.
You can connect both devices to a PC/Mac using the DisplayPort, USB Type-C sockets, or HDMI. There are two cables: one for power, and one USB-C/HDMI cable for video data.
Driver Software
Once you've got everything plugged in you'll need to download the latest drivers from the Wacom or Huion official website.
Whilst you're in the settings menus of wacom driver software you'll notice there's an enormous amount of customisation available to you.
As well as setting shortcut keys on the Remote, you can even set your own pressure sensitivity curves and click thresholds.
Each application can have its own settings, and you can save your custom settings as different profiles, for almost limitless flexibility.
Huion has less fully featured driver software as Wacom's, for example, You can't set application-specific settings.
Huion's driver work fine, reliability has improved quite a bit, except for some crashing and minor issues.
Cooling
There is a fan on Cintiq Pro 24, which keeps the display from ever getting really hot. But many users were not fond of the level of noise that the Cintiq Pro fans make when running.
There are no fans with Huion kamvas Pro 24 so no fan noise. And the unit doesn't get hot at all, the thermals are pretty decent.
Price
Huion kamvas Pro 24 is the clear winner if we take the price into account-1,299.00. Wacom Cintiq Pro 24 cost more at $1,949.95, leaving many artists out of the market.
There are a number of other 24-inch tablets that you can look into such as the – Huion Kamvas Pro 24 (2.5k) and XP-Pen Artist 24 Pro, which is cheaper but has a slightly lower resolution of 2.5K.
Related Posts: Huion Kamvas 13 vs Wacom One 13 Comparison, Huion Kamvas Pro 16 vs Wacom Cintiq 16 Comparison, XPPen Artist 22R Pro vs Wacom Cintiq 22 Comparison .
Conclusion
Both are top-quality display tablets, the screen is extremely clear and the colors are vivacious, probably the best that money can buy.
The 24 inches of diagonals really allow you to go into details very easily, and especially without straining the eyes.
If you're the one that paints and draws from the shoulder with big arm movements and if you can afford it, this is your tablet.
Despite some flaws, Huion Kamvas Pro 24 is a better option, it manages to finely balance having a good selection of features at a reasonable price.
But We also recommend saving up more for Cintiq Pro 24 if line quality, durability and longevity is concern.
For something that is used in a professional setting or even an advanced hobbyist the Wacom is a must.
Source: https://pctechtest.com/wacom-cintiq-pro-24-vs-huion-kamvas-pro-24
